What Is the Safe Temperature for Cooking Chicken?
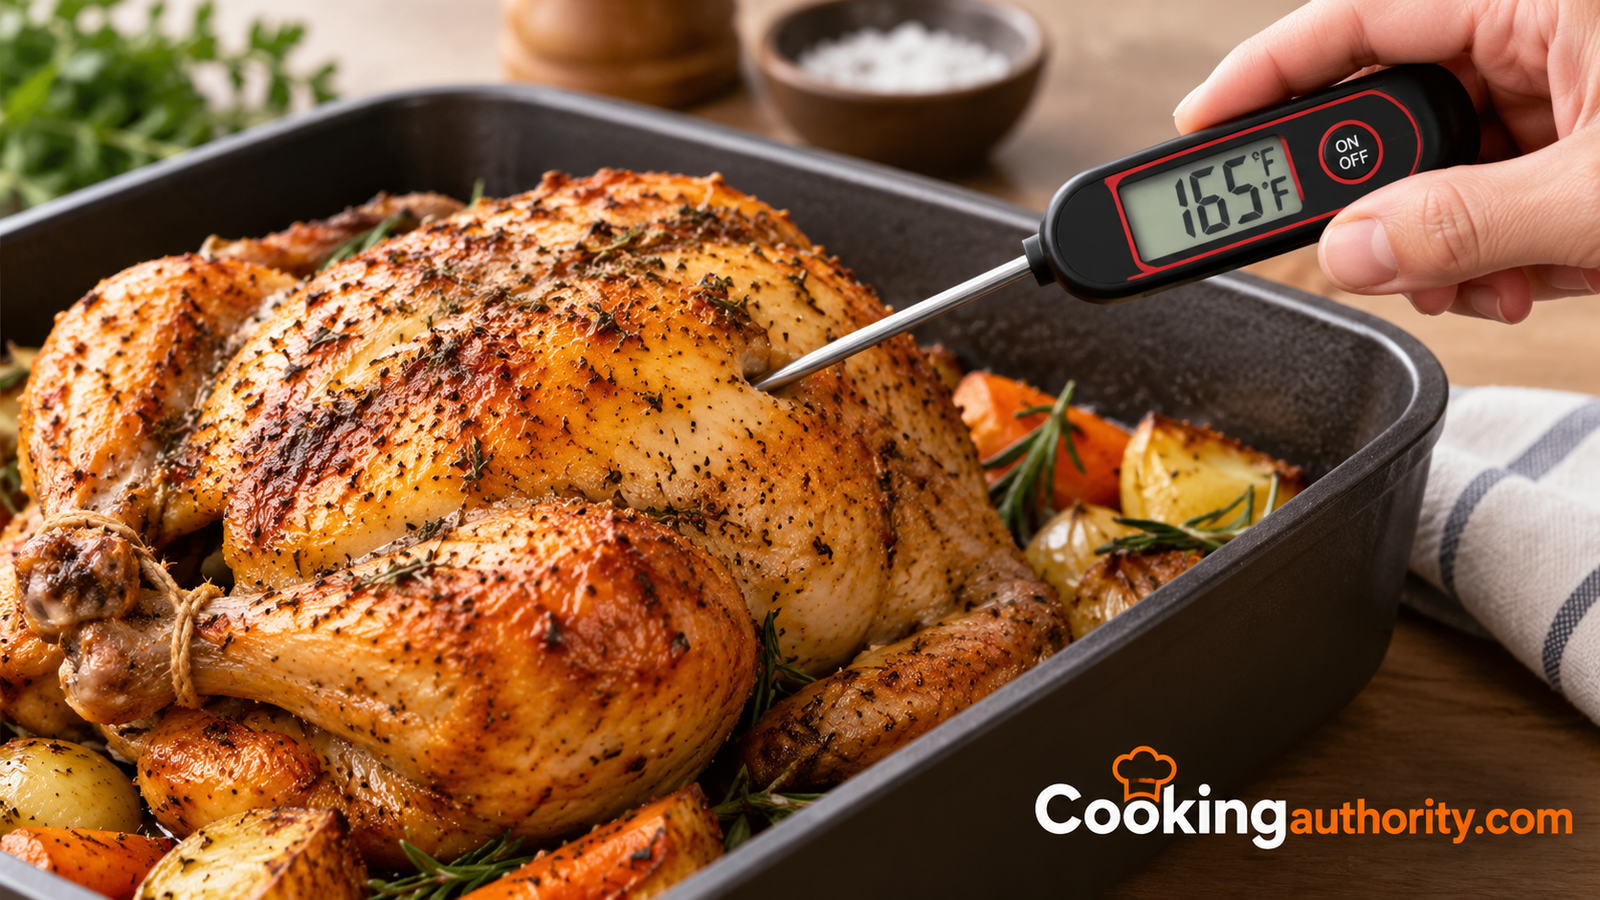
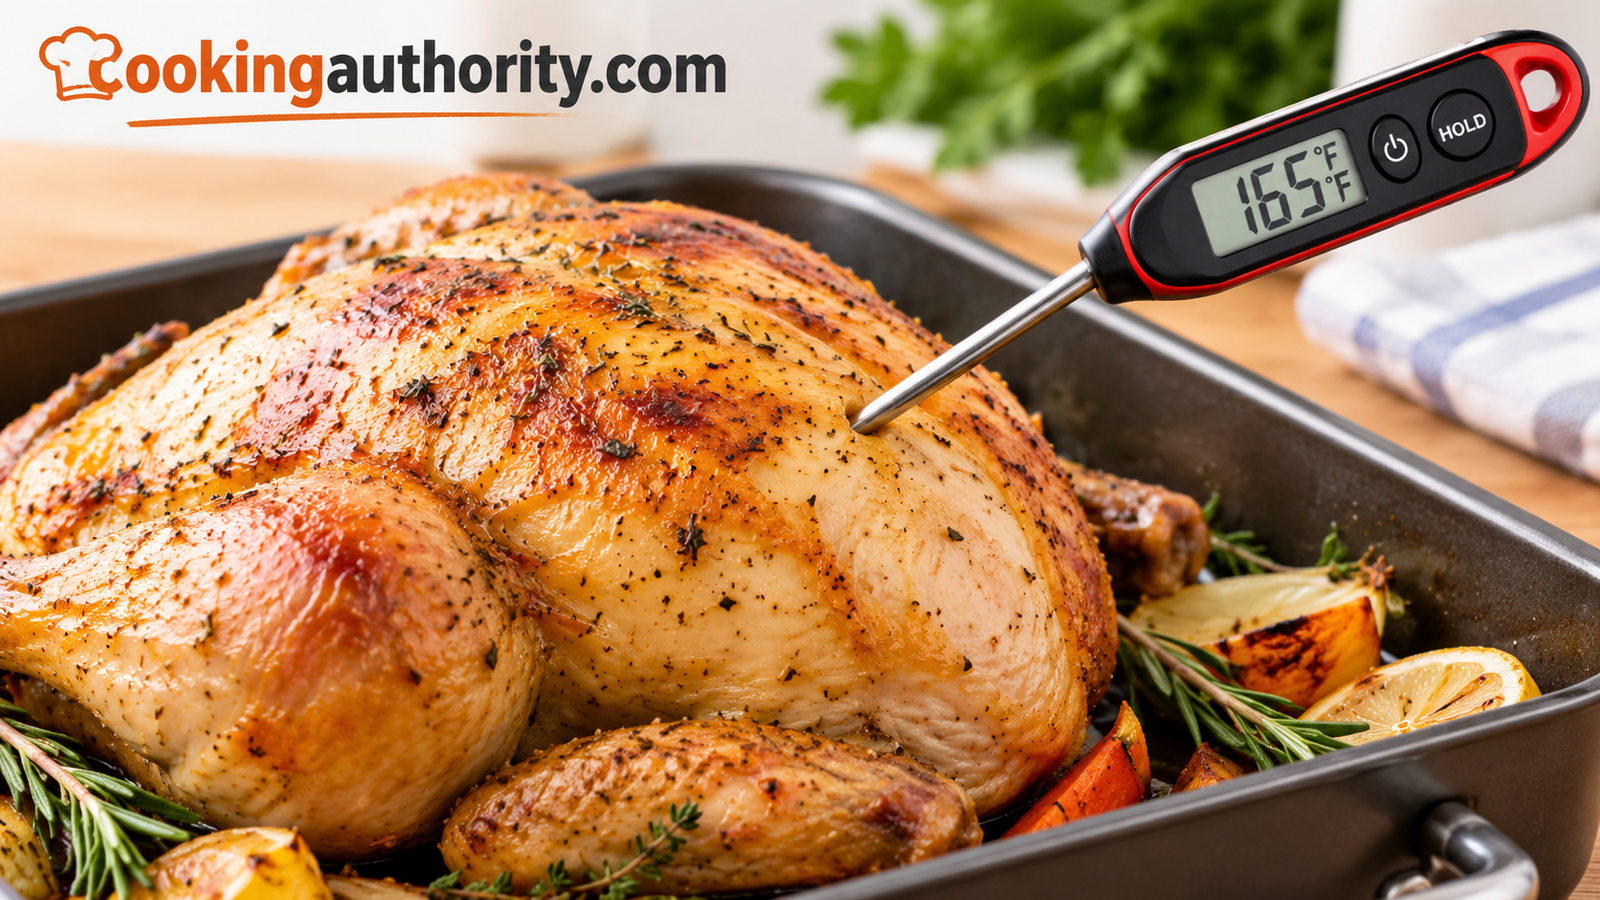
The number is 165°F (74°C) at the thickest part of the meat. But the number is only the beginning of the story. Here is everything that decides whether your chicken ends up safe, juicy, and worth eating.
Few kitchen questions cause as much quiet anxiety as this one. You pull a chicken breast out of the pan, cut into the middle, and stare at it. Is that faint pink okay? Is that clear juice, or is it cloudy? Should it go back in for five more minutes, or will that turn dinner into shoe leather? Cooks of every level have stood in that exact spot.
The good news is that chicken safety is not a mystery, and you do not have to guess. There is a single, well-established number, and there is a simple tool that tells you whether you have reached it. This guide walks through the number, the reasoning behind it, the right way to measure it, and the many small details that separate a nervous cook from a confident one. We will also look at why many experienced cooks deliberately take dark meat past the minimum, how carryover heat changes the math, and what to do with leftovers, frozen birds, and ground poultry.
1. The Short Answer: 165°F (74°C) Is the Safe Temperature
That applies to breasts, thighs, drumsticks, wings, whole birds, ground chicken, and stuffed or casserole dishes containing chicken.
That is the figure recommended by the United States Department of Agriculture for every kind of poultry, and it is the number most food safety agencies around the world agree on. At 165°F, the bacteria that commonly live on raw chicken are destroyed essentially instantly. It does not matter whether the piece is a skinless breast or a whole roasted bird; the target is the same.
A quick conversion table helps if you cook with both scales. In Celsius, 165°F is 74°C. Many European recipes round this to 75°C, which is perfectly fine, and some call for 70°C held for a couple of minutes. That last approach works because heat kills bacteria through a combination of temperature and time, a point we will return to later. For everyday home cooking, though, the simplest rule is the best one: reach 165°F and you are done.
What “internal temperature” really means
The phrase refers to the coldest spot inside the meat, which is almost always the center of the thickest portion. The outside of a chicken can read 200°F while the middle is still dangerously cool, especially when the piece is large, stuffed, or started from partly frozen. A reading taken near the surface tells you very little. Everything in this guide is built around finding that coldest spot and confirming it has reached the target.
Why one number works for everything
Beef steaks and lamb chops have different safe temperatures than chicken because the bacteria risk lives mostly on the surface of whole cuts. Searing the outside kills those surface organisms, so the interior can stay rare. Poultry is different. The organisms associated with chicken can be found not just on the skin but in the processing environment and, in some cases, within the muscle itself. Ground chicken has all of that surface mixed throughout. A single conservative number takes the guesswork out.
Take the guesswork out of dinner. A reliable instant-read thermometer is the single best food safety tool you can own.
Shop Instant-Read Thermometers2. Why Chicken Needs Extra Care in the Kitchen
Raw chicken is one of the most common sources of foodborne illness in home kitchens, and that reputation is earned. Two bacteria are mainly responsible: Salmonella and Campylobacter. Both are found naturally in the intestines of healthy birds, and both can end up on the meat during processing even in clean, well-run facilities. A package of chicken from a reputable store can still carry them. That is not a sign anything went wrong; it is simply the nature of the product, which is why the final cooking step matters so much.
What these bacteria do to people
Illness from these organisms typically brings diarrhea, stomach cramps, fever, and vomiting, usually beginning anywhere from several hours to a few days after eating contaminated food. Most healthy adults recover within about a week, but the experience is miserable, and the risk is higher for some groups. Young children, older adults, pregnant people, and anyone with a weakened immune system can get seriously ill. If you cook for a family, a party, or an older relative, the margin for error shrinks even further.
The temperature danger zone
Bacteria multiply fastest between roughly 40°F (4°C) and 140°F (60°C), a range food safety agencies call the danger zone. Within it, populations can double in as little as twenty minutes. This is the reason you should never leave raw chicken on the counter to “come to room temperature” the way some people do with steak, and the reason cooked chicken should not sit out for more than two hours (one hour when the room is hotter than about 90°F).
It also explains something that surprises many cooks: low and slow is not automatically safe. If a slow cooker takes too long to warm a large mass of cold chicken, the food can spend hours in the danger zone. That is why the setup matters, and why we cover slow cookers and pressure cookers specifically further down.
Cooking is the kill step
Unlike ready-to-eat foods such as salad greens or deli meats, raw chicken is expected to carry some bacteria. Cooking to the proper temperature is the “kill step” that makes it safe. When you hit 165°F, you are not just reducing risk; you are removing the threat the meat arrived with. The remaining safety work is about preventing those bacteria from spreading to other foods before that step happens, which we cover in the final section.
Cooking to 165°F gives you
- Reliable destruction of Salmonella and Campylobacter
- Confidence serving children, elders, and guests
- One easy rule for every cut and recipe
- Repeatable results once you learn your equipment
The tradeoffs to manage
- Lean breast meat can dry out if you overshoot
- You need a thermometer, not just a timer
- Thick or stuffed pieces take longer than recipes suggest
- Carryover heat means pulling slightly early takes practice
Cook with confidence. A thermometer with a fast read time pays for itself in the first few dinners.
Browse Fast-Read Thermometers3. Safe Chicken Temperature Chart by Cut
The food safety minimum is the same for every cut, but the temperature at which each cut actually tastes best is not. This chart gives you both the safety floor and the range many cooks aim for when they want the best texture. Keep in mind that the “best eating” column describes the temperature to reach in the oven, grill, or pan; you will often pull the meat a few degrees earlier and let carryover heat finish the job, as explained later.
| Cut or Type | Safe Minimum | Best Eating Range | Where to Probe |
|---|---|---|---|
| Boneless, skinless breast | 165°F (74°C) | 160–165°F (71–74°C), then rest | Thickest part, center |
| Bone-in breast | 165°F (74°C) | 160–170°F (71–77°C) | Thickest part, away from bone |
| Thigh (bone-in or boneless) | 165°F (74°C) | 175–185°F (79–85°C) | Thickest part, not touching bone |
| Drumstick | 165°F (74°C) | 175–185°F (79–85°C) | Thickest part, beside the bone |
| Wings | 165°F (74°C) | 175–195°F (79–90°C) for crisp skin | Thickest part of the flat or drum |
| Whole chicken | 165°F (74°C) | Breast 160–165°F, thigh 175°F+ | Inner thigh and thickest breast |
| Ground chicken (patties, meatballs) | 165°F (74°C) | 165–170°F (74–77°C) | Center of the thickest patty |
| Stuffing cooked inside a bird | 165°F (74°C) | 165°F+ at the center of the stuffing | Center of the cavity |
| Chicken casseroles and leftovers | 165°F (74°C) | Hot and steaming throughout | Center of the dish |
Metric quick reference
- 160°F = 71°C (breast pull temperature when you plan to rest)
- 165°F = 74°C (food safety target)
- 175°F = 79°C (good lower mark for thighs and drumsticks)
- 185°F = 85°C (very tender dark meat, ideal for braises)
- 140°F = 60°C (top of the danger zone)
- 40°F = 4°C (the refrigerator ceiling)
If you like to keep a printed cheat sheet near the stove, this table is a good candidate. Most people only need the first three rows day to day: breast, thigh, and the whole bird.
Want the chart on your fridge? Magnetic temperature guides keep every safe number one glance away.
Find Temperature Guide Magnets4. Taking an Accurate Temperature Reading
Owning a thermometer is only half the battle. A surprising number of bad readings come from poor technique rather than faulty equipment. Where you place the probe, how deep it goes, and when you check all change the number you see. The goal is to find the coldest point of the meat, because that is the point that decides whether the whole piece is safe.
Probe placement for each cut
- Breasts: Insert from the thick end toward the center, parallel to the cutting board, so the sensing tip sits in the middle of the thickest part. Avoid pushing it through to the pan or the other side.
- Thighs and drumsticks: Aim for the meatiest spot and keep the tip off the bone. Bone conducts heat differently and can read higher than the meat beside it.
- Wings: They are small, so go in from the side of the thickest section, and take your time to find the middle.
- Whole chicken: Check the thickest part of the breast and the innermost part of the thigh, where the leg meets the body. Both should reach their targets.
- Ground chicken and patties: Slide the probe in from the side so the tip lands in the center of the patty.
Timing your checks
Start checking a little earlier than the recipe says. A boneless breast that a recipe estimates at 22 minutes may be done at 17 in a hot oven, or it may need 28 if the pieces are especially thick. Recipes give a range because chicken varies in size, starting temperature, and thickness. Your thermometer is the authority, and the clock is only a guide.
Check in more than one spot when the piece is large, and recheck if the first reading looks too low or surprisingly high. If you are cooking several pieces at once, test the largest one, and when in doubt, test them all. It takes a few seconds.
Common reading mistakes
Mistakes that give false readings
- Touching bone with the probe tip
- Reading near the surface instead of the center
- Probing too shallow with a long-stemmed tool
- Leaving the probe in a hot oven too long on a non-oven-safe unit
- Not waiting for the display to settle
Habits that give true readings
- Check the thickest part from the side
- Wait for the number to stop climbing
- Wipe and sanitize the probe between raw and cooked checks
- Test two spots on big pieces
- Recheck anything that seems off
Great technique deserves a great tool. Look for a thin probe tip and a quick, steady readout.
See Thin-Tip Thermometers5. Choosing and Calibrating the Right Thermometer
Not every thermometer is built for poultry. A glass oven thermometer measures the air inside your oven, not the meat. An old dial thermometer with a thick stem may need to be buried deep in the chicken and can take half a minute to settle. What you want is something that reads quickly, reads accurately, and fits the way you cook. If you are shopping, our roundup of the best cooking thermometers compares the leading options in detail, but here is how the main categories stack up.
| Type | Speed | Best For | Watch Out For |
|---|---|---|---|
| Digital instant-read | 2–4 seconds | Spot checks on any cut | Not meant to stay in the oven |
| Leave-in probe with alarm | Continuous | Whole birds and roasts | Cable and probe placement |
| Wireless smart probe | Continuous, app-based | Grill, smoker, rotisserie | Battery, signal range, price |
| Dial (analog) thermometer | 10–20 seconds | Budget kitchens | Slow, needs calibration |
| Pop-up timer (built into some birds) | One-time trigger | Backup only | Often triggers late, so double-check |
Pros and cons of the two best everyday choices
Instant-read pros
- Fast enough that you do not hold the oven door open
- Works on breasts, thighs, wings, and patties
- Affordable and easy to store
- Easy to move to several pieces
Instant-read cons
- You must remember to check
- Cannot monitor a bird on its own
- Battery needs occasional replacement
- Cheap models drift out of accuracy
Leave-in probe pros
- Alarm tells you when to pull the bird
- No need to open the oven repeatedly
- Great for big roasts and holiday meals
- Tracks progress as the temperature climbs
Leave-in probe cons
- Single-spot readings can mislead
- Cable can be fiddly in tight ovens
- Still worth a second check elsewhere
- More parts to clean
How to check that your thermometer is accurate
A thermometer that is off by five degrees can turn a safe dinner into a risky one, or a juicy one into a dry one. Fortunately, you can test accuracy at home with ice and water.
- Ice-water test: Fill a glass with crushed ice, add cold water, and stir. Insert the probe without touching the sides or bottom. It should read 32°F (0°C).
- Boiling-water test: In a pot of boiling water at sea level, the probe should read about 212°F (100°C). Water boils at lower temperatures at altitude, so adjust accordingly.
- If it is off: Many digital models have a calibration function. If yours does not and it is off by more than a couple of degrees, replace it.
Run the ice-water test every few months, or any time the thermometer has been dropped. It takes less than a minute and gives you real peace of mind.
Ready to upgrade? A leave-in probe with an alarm is perfect for whole roasted chickens.
Shop Leave-In Probe Thermometers6. Carryover Cooking and Why Resting Matters
Here is a detail that explains why cooks who obsess over the thermometer still end up with overcooked chicken. Meat does not stop cooking the moment you remove it from the heat. The outer layers are hotter than the center, and that stored heat keeps moving inward after the chicken leaves the oven, grill, or pan. This process is called carryover cooking, and in a typical breast or whole bird it adds roughly 5 to 10 degrees to the internal temperature.
Using carryover to your advantage
Because of carryover, you can often pull a boneless breast at 160°F (71°C) and let it rest. During the rest, the temperature climbs to 165°F or a touch above, and the meat finishes cooking gently instead of aggressively. The result is noticeably juicier than a breast taken to 165°F in the oven and then allowed to climb even further. This approach is safe as long as the meat actually reaches 165°F during the rest, so verify with the thermometer before you slice.
Larger pieces carry over more. A whole roasted chicken may climb 10 degrees or more while it rests, while a thin cutlet will barely change. Thick pieces cooked at high heat show the biggest jumps, since the outside is much hotter than the center.
| Piece | Typical Carryover | Suggested Rest |
|---|---|---|
| Thin cutlet or tender | 2–4°F | 3–5 minutes |
| Boneless breast | 5–7°F | 5–10 minutes |
| Bone-in pieces | 5–8°F | 5–10 minutes |
| Whole chicken | 8–12°F | 15–20 minutes |
What resting does for flavor and texture
As muscle fibers heat up, they tighten and push moisture toward the center. A short rest gives those fibers time to relax and the juices time to redistribute, so more of that liquid stays in the meat when you cut it. Slice too soon and a pool of juice runs across the board, leaving the meat drier than it should be. The same logic applies to other proteins; if you are curious how long to rest a bigger bird, see our guide on how long a turkey should rest after cooking, and for red meat, our article on how long steak should rest explains the same principle with different timing.
Rest loosely covered, not sealed
Tent the chicken loosely with foil, or simply leave it uncovered on a warm plate. Wrapping it tightly traps steam and can soften crisp skin. For roast chicken, the skin is half the pleasure, so give it room to breathe. If you want to keep it warm for a few minutes, the oven turned off with the door cracked is a good holding spot.
Rest like a pro. A sturdy board with a juice groove catches every drop and keeps your counter clean.
Shop Cutting Boards with Juice Grooves7. White Meat vs. Dark Meat: Why Many Cooks Go Past 165°F
You may have heard that chicken thighs taste better when they are cooked to 175°F or even 185°F. That can sound contradictory when the safe minimum is 165°F, so it is worth understanding. The safe temperature and the delicious temperature are two different questions, and for dark meat they are far apart.
The science in plain language
Breast meat is lean, with little fat and very little connective tissue. It is at its best right around 160 to 165°F and gets dry and stringy quickly beyond that. Thighs and drumsticks are a different animal. They come from muscles that work harder, so they carry more fat and more collagen, the tough connective tissue that holds muscle fibers together. Collagen begins to break down into silky gelatin at higher temperatures, roughly between 175°F and 195°F. A thigh cooked only to 165°F is perfectly safe, but it can feel rubbery and a little chewy near the bone. Push it to the mid-170s or higher and the texture transforms.
What this means in practice
- Treat 165°F as a floor for every cut. Never serve chicken below it.
- Pull breasts at about 160 to 165°F and let carryover finish.
- Take thighs and drumsticks to 175 to 185°F for tenderness.
- For wings, going even higher helps crisp the skin and render the fat.
- Dark meat is forgiving, so extra minutes rarely hurt it.
This is also why a whole chicken is a small cooking puzzle. The breast is ready long before the legs. Cooks solve this in several ways: starting the bird breast-side down, shielding the breast with foil, brining or dry-brining so the white meat holds moisture, or simply spatchcocking so everything cooks more evenly. We will look at those methods in the next section.
Dark meat advantages
- Forgiving if you overcook slightly
- Richer flavor and more moisture
- Stays tender in braises and stews
- Usually cheaper per pound
White meat challenges
- Dries out quickly past 170°F
- Narrow window between juicy and dry
- Benefits from brining or marinating
- Carryover heat matters more
Keep lean breasts juicy. A good brining container makes dry-brining or wet-brining effortless.
Shop Brining Containers8. Whole Birds, Stuffing, and Spatchcock Chicken
A whole chicken is where temperature control gets interesting. It has thin parts and thick parts, lean meat and fatty meat, and an internal cavity that insulates the center. Getting every part to a safe temperature without wrecking the breast takes a little planning.
Where to probe a whole chicken
Check the innermost part of the thigh, near the body but not touching bone, and check the thickest part of the breast. Both must reach at least 165°F. If the thigh is behind schedule, the legs can go back in the oven while the breast rests. Many cooks find the thigh hits 175°F or higher by the time the breast is at its ideal 160 to 165°F, which is normal and fine.
Approximate roasting times
Use these as a planning guide only. Thermometer readings always overrule the clock.
| Bird Weight | Oven Temp | Approx. Time (unstuffed) |
|---|---|---|
| 3 lb (1.4 kg) | 425°F (220°C) | 55–70 minutes |
| 4 lb (1.8 kg) | 400°F (200°C) | 70–85 minutes |
| 5 lb (2.3 kg) | 375°F (190°C) | 1 hour 30 minutes – 1 hour 45 minutes |
| 6 lb (2.7 kg) | 375°F (190°C) | 1 hour 45 minutes – 2 hours |
Stuffing: the part that surprises people
Stuffing cooked inside a chicken absorbs raw juices, which means it must also reach 165°F at its center. This is the main reason many cooks bake stuffing in a separate dish. When it sits in the cavity, it can be the last thing to hit the safe temperature, forcing you to overcook the meat while you wait. If you stuff a bird, loosely pack the cavity, check the center of the stuffing with your thermometer, and do not skip that step.
Spatchcocking: the evenness trick
Spatchcocking means removing the backbone and flattening the bird so that it lies in a single layer. Because the thickness is more even, the breast and legs finish at closer to the same time, and cooking is much faster, often 40 to 50 minutes for a four-pound bird at 425°F. You still check the thigh and breast, and you still aim for 165°F at minimum, but you have a smaller gap to manage between white and dark meat.
Covering and basting
Foil can protect the breast if it browns too quickly, and many cooks use a foil shield for the last stretch of roasting. Basting is less necessary than tradition suggests; opening the oven door repeatedly drops the oven temperature and slows cooking. If you wonder about covering poultry in general, our article on whether you should cover a turkey when cooking explains how the same ideas apply to larger birds.
Roast with the right pan. A rack-fitted roasting pan lets air circulate for even cooking and crisp skin.
Shop Roasting Pans with Racks9. Ground, Frozen, and Processed Chicken
Not all chicken arrives as a tidy breast. Ground chicken, frozen pieces, nuggets, and prepared products each have their own wrinkles. The rule stays the same, 165°F, but how you get there and how you verify it changes.
Ground chicken and chicken burgers
Grinding spreads whatever lives on the surface of the meat throughout the whole mixture. That is why a ground chicken patty should never be served medium the way some people eat a beef burger. Cook patties and meatballs to a firm 165°F in the center, and use a thermometer rather than relying on the look of the patty. Because ground chicken is lean and mild, it benefits from added moisture, such as grated onion, a splash of milk soaked into breadcrumbs, or a little olive oil, so it stays juicy at the higher temperature.
Cooking from frozen
Chicken can be cooked directly from frozen, but it takes about 50 percent longer than thawed, and uneven cooking is the risk. The outside can overcook while the center is still icy. If you do cook frozen pieces, use a moderate oven rather than a blazing one, check several spots, and be especially careful with large bone-in pieces. Whole frozen birds should not be roasted from frozen unless the packaging says so; thaw them first.
Safe ways to thaw
- In the refrigerator: The safest method. Allow roughly one day for every four to five pounds. Place the chicken on a tray or plate to catch drips.
- In cold water: Keep the chicken in a leak-proof bag, submerge it in cold tap water, and change the water every 30 minutes. Cook right away once thawed.
- In the microwave: Use the defrost setting and cook immediately afterward, since parts of the meat may begin to cook.
- Never on the counter: Leaving chicken out lets the surface warm into the danger zone while the center is still frozen.
Breaded, pre-cooked, and processed products
Frozen nuggets, tenders, and stuffed chicken products often look cooked because the breading is browned. Some are raw inside, and the label will say so. Follow the package directions and verify 165°F in the center. For products labeled fully cooked, you are reheating rather than cooking, but you should still heat them until steaming hot and at 165°F, especially for children and anyone vulnerable.
Thaw safely and stay organized. Shallow containers keep raw chicken contained in the refrigerator.
Shop Meat Storage Containers10. Cooking Methods and Their Target Temperatures
Different cooking methods deliver heat in different ways, but they all end at the same finish line. Here is what to expect from each popular method and what to watch for when you are checking temperature.
| Method | Typical Heat | Watch For |
|---|---|---|
| Oven roasting | 375–425°F (190–220°C) | Hot spots, uneven browning |
| Pan-searing | Medium to medium-high | Burnt outside, raw inside on thick pieces |
| Grilling | Medium direct and indirect | Flare-ups, charred skin, pink bones |
| Air frying | 375–400°F (190–200°C) | Crowding, fast surface browning |
| Slow cooker | Low or high | Time in the danger zone if overloaded |
| Pressure cooker | High pressure steam | Cooking time varies by cut and size |
| Poaching | Gentle simmer | Boiling too hard toughens the meat |
Oven roasting and baking
The oven is the most forgiving method. Higher heat of 400 to 425°F gives crisper skin and faster cooking for pieces, while moderate heat of 350 to 375°F suits bigger birds and casseroles. Use an oven thermometer to confirm your oven is actually the temperature on the dial; many home ovens run 15 to 25 degrees off.
Pan-searing
Searing creates fantastic flavor, but the outside browns faster than the inside cooks. For thick breasts, sear for a few minutes per side, then finish in a hot oven or lower the heat and cover the pan. Slicing a thick breast horizontally into two cutlets, or pounding it to even thickness, cooks it more evenly and shortens the time.
Grilling
On the grill, use two zones: a hot side for browning and a cooler side for finishing. Bone-in pieces do best starting on the cooler side and finishing over direct heat. Chicken skin drips fat, so keep an eye out for flare-ups that blacken the outside before the middle is done. Always probe, because grill marks give no clue about the inside.
Air frying
Air fryers circulate hot air quickly, which gives crisp results with little oil. They also brown surfaces fast, so the pieces can look finished early. Do not overcrowd the basket, flip pieces halfway, and check the thickest piece. Expect most breasts to need around 18 to 25 minutes at 375°F, depending on size.
Slow cookers and pressure cookers
Slow cookers are safe when used correctly, but they warm up gradually. Do not fill them beyond about two-thirds, never put frozen chicken in a slow cooker, and use the high setting for the first hour if a recipe allows. Because the chicken sits in liquid for hours, it will exceed 165°F easily, but it is still worth verifying that every piece reached the target. Pressure cookers heat fast, and they tolerate frozen chicken better, though cooking times need to be extended.
Cookware matters a little too
The pan you choose affects how evenly heat reaches the chicken. Heavy stainless steel and cast iron hold heat well for searing, while nonstick makes cleanup easy for delicate cutlets. If you are weighing materials, our comparison of ceramic versus stainless steel for cooking helps you pick, and if you prefer to avoid certain coatings, take a look at our list of the best non-toxic cooking pans.
Cook chicken evenly. A heavy-bottomed skillet holds steady heat for a golden sear.
Shop Oven-Safe Skillets11. Color, Juices, and the Pink Meat Myths
Walk into any family kitchen and you will hear folk rules about chicken doneness: “the juices should run clear,” “there should be no pink anywhere,” “it is done when the leg wiggles.” These rules persist because they feel intuitive. Unfortunately, they are unreliable, and some can lead you to either undercook or overcook.
Pink chicken is not always unsafe
Chicken can remain pink even after reaching a safe temperature. This is especially common in young birds, where the bones and surrounding meat may carry a pinkish tint, and in meat that has been exposed to certain gases in the oven, such as those produced during gas cooking, or in smoked or grilled chicken, which develops a pink “smoke ring.” Pink near the bone of a leg that has hit 175°F is usually just pigment from the bone marrow.
White chicken is not always safe
The reverse can also happen. Chicken can turn pale and opaque on the outside while the center is still below 165°F, especially with thick pieces or when the heat was very high. Cutting open a piece and judging by sight alone can lead you to serve something unsafe. Temperature is the only dependable measure.
| Old Rule | Reliable? | What Actually Works |
|---|---|---|
| Juices run clear | No | Thermometer reading of 165°F |
| No pink anywhere | No | Thermometer reading in the thickest part |
| Leg wiggles loosely | Sometimes | Check the thigh at its thickest point |
| Cook time is up | No | Use time as a guide only |
| Pop-up timer popped | Not alone | Back it up with a thermometer |
Other signs that help but do not replace a thermometer
- The meat feels firm but springy rather than soft and squishy.
- The juices appear clear to pale yellow rather than red or cloudy pink.
- The skin is golden and crisp, which signals browning, not necessarily doneness.
- The meat pulls easily from the bone, which is more reliable for dark meat than breast.
Use these as supporting clues. If your thermometer says 165°F or higher in the thickest part, the chicken is safe regardless of a rosy tint near the bone. If your thermometer says 155°F, it is not, regardless of how pale the meat looks.
Stop cutting into your chicken to check. A quick probe keeps the juices where they belong.
Shop Waterproof Thermometers12. Food Safety Beyond the Thermometer
Cooking chicken to 165°F makes the chicken itself safe. It does not protect the rest of the kitchen from what happened before the cooking started. Most chicken-related illness is caused by cross-contamination, undercooking, or poor storage afterward, so a safe temperature has to be part of a broader set of habits.
Do not wash raw chicken
It feels like a responsible thing to do, but rinsing raw chicken does not remove bacteria in any meaningful way, and it spreads droplets of contaminated water onto the sink, counters, and nearby food. Cooking is what kills the bacteria. For a deeper explanation, see our guide to whether you should wash chicken before cooking. If you want to remove any surface moisture or bone fragments, patting the meat with paper towels does the job.
Prevent cross-contamination
- Use a separate cutting board for raw chicken, or wash the board thoroughly with hot soapy water before it touches anything else.
- Keep raw chicken on the lowest shelf of the refrigerator so juices cannot drip onto ready-to-eat foods.
- Wash hands for 20 seconds after handling raw chicken, and wash knives, tongs, and platters as well.
- Never put cooked chicken on the same plate that held the raw meat.
- Sanitize counters and sink handles with a food-safe cleaner after prep.
Storing and reheating leftovers
Refrigerate cooked chicken within two hours of cooking, or within one hour if the room is hot. Store it in shallow containers so it cools quickly, and use it within three to four days. Freezer storage extends that considerably, though quality gradually declines. When you reheat leftovers, bring them to 165°F again, stirring or turning pieces so the heat is even. Soups and stews should reach a full boil.
| Situation | Rule of Thumb |
|---|---|
| Raw chicken in the fridge | Use within 1–2 days at 40°F (4°C) or below |
| Cooked chicken in the fridge | Use within 3–4 days |
| Cooked chicken left out | Discard after 2 hours (1 hour if above 90°F) |
| Freezing | Keep at 0°F (-18°C) or below |
| Reheating | Reach 165°F (74°C) throughout |
A simple safe-chicken checklist
- Keep chicken cold until you are ready to cook it.
- Thaw in the refrigerator, cold water, or microwave only.
- Skip the rinse and pat dry instead.
- Cook to 165°F in the thickest part, verified with a thermometer.
- Rest the meat, then serve promptly.
- Chill leftovers quickly and reheat them to 165°F.
These habits take little time and become automatic after a few weeks. They turn chicken from a source of low-level worry into one of the easiest and most affordable proteins you can cook.
Build a safer kitchen. Color-coded cutting boards make it easy to keep raw poultry separate.
Shop Color-Coded Cutting BoardsFrequently Asked Questions About Safe Chicken Temperature
What is the safe internal temperature for cooking chicken?
The safe internal temperature for all chicken is 165°F (74°C), measured in the thickest part of the meat with a food thermometer. This applies to breasts, thighs, wings, whole birds, ground chicken, and dishes containing chicken.
Is it safe to eat chicken cooked to 160°F?
Chicken that reaches 160°F and is then allowed to rest will often climb to 165°F through carryover heat, and it is safe once it gets there. If you serve it at 160°F without verifying, you are below the standard recommendation, so check again after resting before you cut it.
Can chicken be safe if it is a little pink?
Yes. Color is not a reliable indicator of safety. Chicken that has reached 165°F can still look pink near the bone or in the juices, particularly in younger birds or in meat that has been grilled or smoked. Trust the thermometer, not the color.
Why do chefs cook chicken thighs to 175°F or higher?
Thighs and drumsticks contain more fat and connective tissue, which becomes tender at higher temperatures. They are safe at 165°F, but many cooks prefer them at 175 to 185°F because the collagen breaks down and the meat turns silky instead of chewy.
Where should I place the thermometer in a whole chicken?
Insert it into the thickest part of the breast and the innermost part of the thigh, avoiding bone. Both areas should reach at least 165°F. If you stuffed the bird, check the center of the stuffing too.
How long does chicken need to be at 165°F to be safe?
At 165°F, harmful bacteria are destroyed almost instantly, so there is no need to hold it there. Lower temperatures can also be safe when held for longer, which is how some chefs and sous vide cooks work, but that approach requires precise equipment and reliable time-and-temperature tables. For everyday cooking, reaching 165°F is the simplest rule.
Is it okay to cook chicken from frozen?
It is safe if you cook it thoroughly, but it takes about half again as long and cooks less evenly. Use a moderate oven, check several spots with a thermometer, and avoid roasting a whole frozen bird unless the instructions say it is fine. Thawing in the refrigerator gives better results.
Should I wash chicken before cooking?
No. Rinsing raw chicken spreads bacteria around the sink and counters and does not make the meat safer. Pat it dry with paper towels instead, and let proper cooking do the work of killing germs.
How long can cooked chicken sit out?
No more than two hours at room temperature, or one hour if the temperature is above 90°F. After that, bacteria can multiply to unsafe levels, and reheating may not fix it. Refrigerate leftovers promptly in shallow containers.
What temperature should I reheat leftover chicken to?
Reheat leftovers to 165°F throughout. Stir or rotate the food so heat is even, particularly in the microwave, which can leave cold spots. Soups and sauces should come to a full boil.
Does a pop-up timer guarantee my chicken is done?
Not on its own. Pop-up timers can trigger late or unevenly, and they measure only one spot. Use them as a backup and confirm with a real thermometer in the breast and thigh.
What thermometer is best for checking chicken?
A digital instant-read thermometer with a thin probe is the most versatile choice for chicken pieces. For whole birds, a leave-in probe with an alarm adds convenience. Whichever you choose, test its accuracy with an ice-water check every few months.
Conclusion: Make 165°F Your Kitchen Habit
The safe temperature for cooking chicken is 165°F (74°C) in the thickest part of the meat, and that single number protects you, your family, and your guests from the bacteria that chicken naturally carries. Everything else in this guide is about getting there smoothly: probing the right spot, using a trustworthy thermometer, understanding carryover heat, and recognizing that dark meat often tastes best a good deal higher than the minimum.
Once you drop the old habits of judging doneness by color, clear juices, or the clock, chicken gets easier and better. You will pull juicy breasts at the right moment, cook thighs until they are tender, and serve leftovers without second-guessing. The tools are inexpensive, the technique takes minutes to learn, and the payoff is dinner you can enjoy without worry.
Start with a good thermometer, keep raw and cooked foods apart, and let the numbers guide you. Safe chicken is not complicated; it is simply a matter of measuring instead of guessing.
Ready to cook safer, juicier chicken tonight? Start with a dependable thermometer and make every meal foolproof.
Shop Thermometers for ChickenYou May Also Like
Thoughtful picks for anyone who loves spending time in the kitchen.
When foil helps, when it hurts, and how to get crisp skin and juicy meat.
Safe, clog-free ways to get rid of used oil after frying chicken and more.