Do You Cover a Turkey When Cooking? The Complete Guide to Foil, Lids, and Bare-Skinned Roasting
Everything you need to decide when to tent, when to uncover, and how to land juicy meat under crackling skin.
Every November, a quiet argument breaks out in kitchens everywhere. One person swears by a snug foil blanket over the bird. Another insists that anything but bare, exposed skin is a crime against Thanksgiving. A third is holding a roasting bag and wondering whether either of them has ever actually tasted a juicy turkey. If you have ever stood in front of a raw bird with a roll of foil in one hand and a basting brush in the other, unsure what to do, this guide is for you.
The question sounds simple: do you cover a turkey when cooking? But the honest answer touches on heat transfer, moisture, browning chemistry, food safety, and a few practical details about your oven and your pan. In the pages below we break the whole thing down in plain language, so you can pick a method that fits your bird, your equipment, and your tolerance for risk on the biggest meal of the year.
1. The Short Answer: Should You Cover a Turkey or Not?
That is the one-sentence version. The longer version is that “cover or don’t cover” is really a question about what you want from the finished bird. If your priority is crackling, mahogany skin that photographs beautifully on the table, you want the oven’s dry heat working on the surface for as long as possible. If your priority is gentle, forgiving cooking with minimal risk of dried-out breast meat, covering helps. And if you want both, which most of us do, a hybrid approach gives you something close to the best of each world.
There is no single universal rule because turkeys are not uniform. A fourteen-pound bird with a thick, plump breast behaves differently from a twenty-two-pound tom with long legs. A convection oven that blasts hot air around the cavity behaves differently from an old gas oven with a hot spot in the back left corner. A dark, heavy roasting pan absorbs heat differently from a shallow, shiny one. The method you choose should respond to those variables instead of ignoring them.
What “covered” really means
When cooks say they cover a turkey, they might mean several different things. They may be draping a sheet of heavy-duty aluminum foil tightly over the whole pan and crimping the edges. They may be tenting a loose piece of foil only over the breast. They may be using a lidded roaster, a roasting bag, or even a cheesecloth soaked in butter. Each of these creates a different cooking environment, and each affects the skin, the juiciness, and the cooking time in its own way. We will walk through every one of them in the sections that follow.
A simple decision snapshot
| Your Goal | Best Approach | Why It Works |
|---|---|---|
| Crispy, deeply browned skin | Uncovered the whole way, or uncovered with a late foil tent | Dry heat dehydrates the skin surface so it can brown and crisp |
| Maximum moisture, low stress | Covered with foil for the first stretch, uncovered at the end | Trapped steam slows surface evaporation and protects the breast |
| Beginner friendly and forgiving | Hybrid: uncovered start, foil tent when browned | Easy to adjust while the bird is in the oven |
| Minimal cleanup | Roasting bag | Juices stay inside the bag, though skin will be softer |
| Hands-off, big batch | Lidded electric roaster | Frees up the main oven for side dishes |
If you only take one thing from this article, let it be this: the thermometer matters more than the foil. Whether you cover the bird or not, the real determinant of juicy meat is pulling the turkey out at the right internal temperature. A reliable cooking thermometer will save you from more ruined dinners than any covering technique ever will.
Why the debate never quite dies
Part of the reason this question keeps resurfacing is that both camps are right about their own kitchens. A cook with a well-calibrated oven, a dry-brined bird, and a good probe thermometer can roast uncovered from start to finish and get a perfect result. A cook with a hot oven, a very large turkey, and a nervous guest list may be far better off with a covered start. Cooking advice that ignores your specific equipment and your specific bird will always feel contradictory, because it was written for someone else’s situation. Treat every rule here as a starting point and let your own observations refine it year after year.
It also helps to decide in advance what a good turkey means for your table. For some families the skin is the star and gets fought over at the carving board. For others the sliced breast is what matters, and the skin barely gets eaten. Knowing which camp your guests belong to takes a lot of pressure off the covering decision, because it tells you which trade-off you can afford to make.
A fast, accurate instant-read thermometer is the single best upgrade for turkey day.
2. How Heat Moves Around a Turkey (And Why It Matters for Covering)
To understand why covering changes the outcome, it helps to picture what is actually happening inside your oven. A turkey is an awkward shape. It has a thick, dense breast, thinner thighs and drumsticks that hold more connective tissue, and a hollow cavity. Those parts cook at different speeds, and the whole point of any covering strategy is to manage that mismatch.
Three ways heat reaches the bird
Heat gets into your turkey through conduction, convection, and radiation. Conduction is heat passing directly through the meat from the surface to the center, and it is slow because meat is mostly water and does not conduct heat well. Convection is hot air circulating around the bird, carrying heat to the skin. Radiation is infrared energy coming off the oven walls, the heating element, and the pan. When you cover a turkey with foil, you interrupt two of these three. The foil reflects a large portion of the radiant heat, and it blocks the moving hot air from touching the skin directly. What is left is mostly heat trapped in the pocket of air and steam under the foil.
That is why a covered turkey tends to cook more gently on the surface. The breast, which sits closest to the top heating element and is the most exposed part of the bird, gets shielded. The legs and thighs, tucked lower and often partially surrounded by the pan, keep cooking relatively normally. This is exactly what you want, because dark meat needs to reach a higher temperature than white meat to become tender, while the breast dries out the moment it is overcooked.
The breast and thigh problem
White meat is lean and has little connective tissue, so it is at its best when it just reaches a safe temperature. Dark meat is loaded with collagen, which needs time and a higher temperature to melt into gelatin. The safe minimum internal temperature for poultry is 165°F (74°C), but many cooks pull the breast at around 160°F and let carryover heat finish the job, then take the thighs closer to 175°F or even 180°F for the best texture. When the breast and thighs finish at the same moment in the oven, one of them is compromised. Covering the breast is one of the cleanest ways to slow its progress while the thighs catch up.
Moisture, evaporation, and the dry-skin principle
Here is the catch. Skin only browns and crisps when its surface is dry. As long as there is liquid water on the surface, the temperature of the skin is capped near the boiling point of water, which is far below the temperatures required for browning reactions to take off. Under a tight foil cover, steam accumulates, the skin stays wet, and the browning reactions never get a chance to run. This is the heart of the covered versus uncovered debate. Covering protects the meat from drying out, but it also shields the skin from the dry heat it needs.
The browning we love on a roast turkey comes from the Maillard reaction, in which amino acids and sugars react at high temperatures to create hundreds of flavorful compounds and a deep golden color. Fat rendering and dehydration of the skin add the crunch. To get all of that, you need a dry surface and sustained heat. A turkey that spends its whole cook wrapped up gets neither.
Why oven type changes everything
| Oven Type | How It Behaves | Covering Advice |
|---|---|---|
| Conventional (standard bake) | Hottest near the top element, can have hot spots | Tent the breast if the top browns early; rotate the pan halfway |
| Convection | Fan circulates hot air, browns faster and cooks quicker | Start uncovered, watch closely, tent earlier than you think |
| Gas | More humid, heat comes from the bottom | Skin can brown more slowly; you may rarely need a tent |
| Electric roaster | Enclosed, moist, lower browning | Lid stays on; remove it for the last stretch if you want color |
Knowing your oven’s personality is half the battle. If you have never roasted a large bird in it, do a quick test by baking a tray of plain bread slices at your intended temperature and checking which areas toast fastest. Those are your hot spots, and you can plan your tenting around them.
An oven thermometer reveals whether your dial is telling the truth.
3. Roasting a Turkey Covered with Foil: What Actually Happens
Covering a turkey with aluminum foil is the method many of us grew up with. Grandma’s bird came out of the oven under a silver dome, and the carving ritual started with peeling it back to reveal pale, steaming, tender meat. It is a classic approach, and it still has its supporters. Let’s look at what it does well, where it falls short, and how to get the most out of it if you decide to go this route.
The benefits of a foil cover
A foil cover traps steam and moisture around the bird. That makes the oven environment gentler, and it slows the surface of the turkey from drying out. The breast meat, in particular, is protected from the radiant heat of the oven. For cooks who have been burned by dry turkey in the past, this can feel like an insurance policy.
Covering also reduces splatter. Fat popping from the bird and drippings landing on the oven floor are real problems, particularly in a smaller oven. A cover keeps the oven walls cleaner and cuts down on smoke, which is a genuine benefit if you are sensitive to kitchen fumes or your smoke alarm has a hair trigger.
Pros of Roasting Covered
- Gentler, more even surface cooking
- Less risk of overcooked, dry breast
- Cleaner oven with less splatter and smoke
- Helpful for large birds that need long cook times
- Good for keeping pan drippings from burning
Cons of Roasting Covered
- Pale, rubbery skin without a final uncovered stage
- Meat can taste steamed rather than roasted
- Less developed roasted flavor
- Wet skin means weaker gravy base from drippings
- Foil can stick to skin if not oiled
How to cover a turkey properly
If you choose to cover the entire bird, use heavy-duty foil, because regular foil tears easily and can poke into the skin. Lightly grease the side of the foil that will touch the turkey with oil or cooking spray, otherwise the skin can fuse to the foil and peel off with it when you uncover. Crimp the foil loosely around the rim of the pan, leaving a bit of room above the breast so air and steam can move. A tight, flat seal presses against the skin and makes the surface even soggier.
Plan to remove the foil for the last 45 minutes to an hour of cooking. That uncovered stretch is your window to dry, brown, and crisp the skin. Raise the oven temperature by 25°F to 50°F during this phase if your bird is lagging, and baste once or twice with melted butter or pan juices for added color and flavor.
The tent versus the full cover
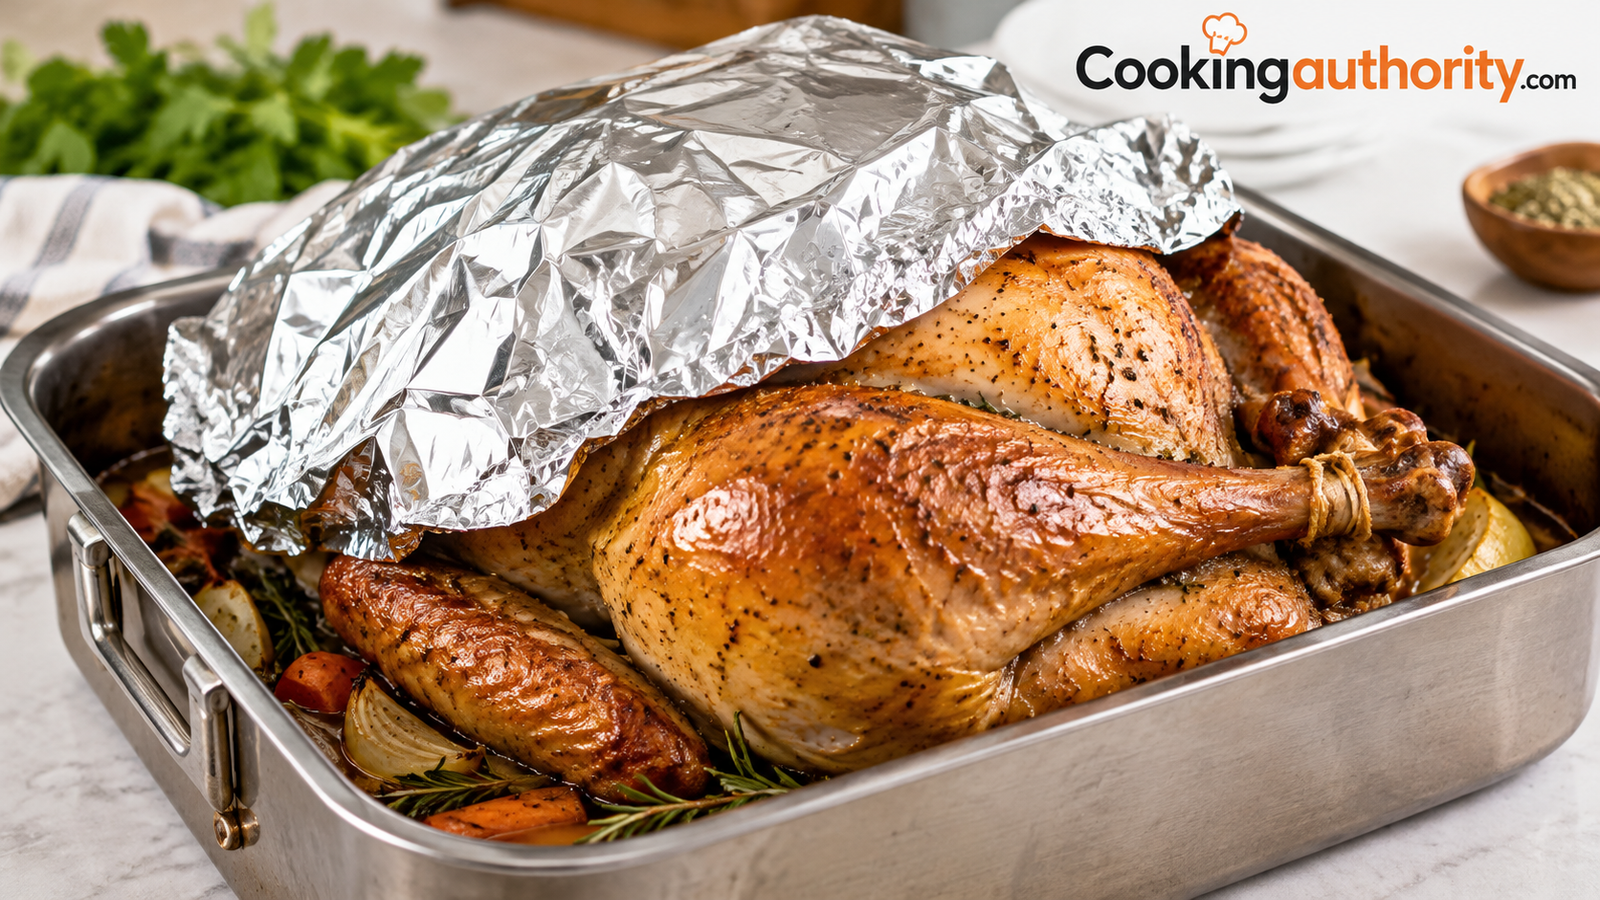
There is an important distinction between a full cover and a tent. A full cover seals the pan or the whole bird. A tent is a loose piece of foil, often just a square or a shaped shield, laid over the breast alone while the rest of the bird stays exposed. A tent protects the most vulnerable part and still lets the legs, wings, and sides brown. It is usually the better choice when you want both protection and color.
When covering from the start makes sense
There are situations where a longer covered period is smart. A very large turkey of twenty pounds or more takes many hours, and the breast can dry out long before the thighs are ready. Starting under foil helps. Likewise, if you are cooking a turkey in an oven that runs hot, or one with a heating element that sits close to the bird, a covered start prevents the top from scorching. And if you are cooking a stuffed bird, which takes longer for the center to reach a safe temperature, covering early can help the surface keep pace.
Just remember that the cover has to come off eventually. The magic of a roasted turkey lies in the contrast between tender meat and crisp, savory skin, and you cannot get the second half of that contrast without exposure to dry heat.
Wider, thicker foil makes tenting a large bird far easier and prevents tearing.
4. Roasting a Turkey Uncovered: Skin, Color, and Crunch
Roasting a turkey with nothing over it is the purist’s approach. You put the bird on a rack, slide it into the oven, and let the dry heat do its work. Done well, the payoff is spectacular: deep amber skin, crisp edges, rendered fat, and concentrated drippings that make a rich gravy. Done carelessly, you can end up with a scorched breast and undercooked thighs. Here is how to make the uncovered method work.
Why uncovered gives better skin
Turkey skin is mostly water and fat sitting on top of connective tissue. For it to turn crisp, that water has to leave and the fat has to render out. In an open pan, moisture evaporates freely, the surface dries, and the temperature of the skin climbs high enough for browning. The longer your turkey spends exposed, the more this happens. It is also why a cold, dry bird straight from the refrigerator, with skin that has air-dried overnight, browns so much better than a wet one.
Uncovered roasting also produces better pan drippings. The juices and fat that fall into the pan caramelize on the bottom, leaving the dark, savory fond that turns into superb gravy. When a pan is sealed under foil, the drippings stay thin and pale, and the gravy has to work much harder for flavor.
Managing the risk of dry breast meat
The downside of going bare is that the breast is directly exposed to the oven’s heat from the top. Here are the best ways to protect it without covering it:
- Start the bird breast-side down for a short time. Some cooks roast the first stretch upside down so the thighs get the initial heat, then flip it. This is awkward with a large bird, so only try it if you have strong help.
- Use a lower, steadier oven temperature. Roasting at 325°F gives the interior time to catch up without the surface racing ahead.
- Chill the breast. Placing a bag of ice on the breast for 30 minutes before the bird goes into the oven gives the thicker white meat a head start against the legs.
- Rub butter or oil under and over the skin. Fat helps conduct heat evenly and promotes browning.
- Watch the color, not just the clock. If the skin browns before the meat is cooked, you have a signal to tent.
High-heat blast methods
Some cooks start the bird at a very high temperature, roughly 425°F to 450°F, for the first 30 minutes to kick-start browning, then drop to 325°F for the remainder. This is a bit of a gamble because it can scorch the surface, but with a watchful eye it produces gorgeous skin. Others reverse the process, cooking low and slow, then finishing hot. The reverse approach gives very even interior cooking and a crisp finish in the final 20 minutes.
| Uncovered Strategy | Oven Temperature | Best For | Watch Out For |
|---|---|---|---|
| Steady roast | 325°F to 350°F throughout | Beginners, even cooking | Skin may need a final blast for crispness |
| High-heat start | 425°F for 30 minutes, then 325°F | Deep color early | Scorching on the wings and breast tip |
| Low and slow then hot | 275°F to 300°F, finish at 450°F | Very even meat, crisp skin | Longer total time, needs good timing |
| Spatchcock | 425°F throughout | Speed, even cooking | Requires poultry shears and a sturdy sheet pan |
Pros of Roasting Uncovered
- Crisp, deeply browned skin
- Rich, roasted flavor
- Concentrated drippings for gravy
- Simple, minimal gear
- Easy to monitor the bird visually
Cons of Roasting Uncovered
- Higher risk of overcooked breast
- Can brown unevenly in hot spots
- More smoke and splatter in the oven
- Requires more attention while cooking
- Wings and tips can burn
If you love the idea of crackling skin but fear the dry breast, do not abandon the uncovered method. Simply keep foil in reserve and use it when the bird tells you it needs it. That is the logic behind the hybrid approach, which we cover next.
Reading the bird while it roasts
Uncovered roasting rewards attention. About an hour in, take a look through the oven window and compare the color of the breast with the thighs. If the breast is clearly darker, it is time to plan your tent. If the wings are starting to blacken, wrap the tips. If one side of the bird looks paler than the other, rotate the pan 180 degrees so the cooler side faces the hotter part of the oven. These small adjustments take a few seconds each and are the real secret behind turkeys that look as good as the ones in magazines.
Pay attention to the drippings, too. If the juices in the pan turn dark brown and start to smoke, add a splash of stock or water to the bottom of the pan to keep them from scorching, because burnt drippings make bitter gravy. The goal is a pan with golden-brown, savory juices, not a blackened one.
A sturdy roasting pan with a V-rack lifts the bird so hot air reaches every side.
5. The Hybrid Method: Start Uncovered, Tent When Needed
If you ask a room full of experienced cooks how they roast a turkey, a surprising number will describe some version of the hybrid method. The idea is straightforward: roast the bird uncovered so the skin can start browning, then shield the breast with a loose foil tent once it reaches the color you want, and let the meat finish cooking underneath. It is flexible, forgiving, and responsive to what your particular oven and bird are doing.
Step-by-step hybrid roasting
- Heat the oven to your target temperature. A common choice is 325°F to 350°F. Position the rack in the lower third so the bird sits comfortably with space above it.
- Dry and season the turkey. Pat it thoroughly with paper towels. Rub with softened butter or oil and season generously, including under the skin.
- Roast uncovered for the first stretch. For most birds this is the first 1 to 1.5 hours, or until the breast turns a pleasant golden color.
- Tent the breast. Lay a loose piece of foil over the breast and upper portion of the bird, shiny side out or in, it makes little difference, and tuck lightly at the edges.
- Continue until the thermometer says it is done. Check the breast and the thickest part of the thigh, avoiding bone.
- Remove the tent for the final 20 to 30 minutes. This gives the skin one more round of dry heat to crisp up.
- Rest the bird before carving. This step is non-negotiable for juicy meat.
Why timing the tent matters
Tenting too early cuts off the browning you were hoping for. Tenting too late means the skin has already burnt. The sweet spot is when the breast has reached a medium golden brown, which typically happens when the internal temperature of the breast is somewhere in the 120°F to 140°F range. At that point the skin has built up color, and the foil’s job is simply to slow the climb in the breast so the thighs can reach their ideal temperature.
Strategic partial tenting
You do not need to cover the entire bird. Often the only trouble spots are the breast peak, the wing tips, and the top of the drumsticks. Small, targeted foil pieces over those areas keep them from over-browning while everything else stays exposed. A thin strip of foil crimped around each wing tip is a classic trick that costs almost nothing.
Foil shield versus foil tent
| Technique | Coverage | Effect on Skin | When to Use |
|---|---|---|---|
| Full foil cover | Entire bird and pan | Soft, pale skin | Very large birds, early cooking |
| Loose breast tent | Breast only | Slows breast browning, rest of bird browns | Most standard roasts |
| Foil shield (pre-shaped) | Breast contour | Reflects heat, preserves color | When breast browns early |
| Wing and leg wraps | Tips only | Prevents burning of thin areas | Any method |
The hybrid method is the one we recommend for most home cooks, because it responds to feedback. You are not committing to a plan that cannot change, and you are not guessing before you have seen how your own oven treats the bird.
Pre-cut turkey breast shields make mid-roast tenting quick and mess-free.
6. Prepping the Bird Before It Ever Meets the Oven
Whether you cover or not, the decisions you make before the turkey goes into the oven shape the final result at least as much as the foil does. A well-prepped bird is more forgiving, browns better, and tastes better. Here is how to set yourself up for success.
Thawing safely
A frozen turkey must be thawed completely before roasting, and the safest method is in the refrigerator. Plan on roughly 24 hours for every 4 to 5 pounds of bird, so a sixteen-pound turkey needs about three to four days. Keep it in its original wrapper on a tray to catch drips. If you are short on time, you can thaw in a sink of cold water, changing the water every 30 minutes, at roughly 30 minutes per pound. Never thaw a turkey on the counter at room temperature.
Do not rinse the bird
It is tempting to rinse a raw turkey, but rinsing splashes bacteria around your sink and counters without making the meat any safer. Pat the bird dry instead. We cover the reasoning in our guide on whether you should wash chicken before cooking, and the same logic applies to turkey.
Dry brining versus wet brining
Brining adds seasoning and helps the meat hold moisture. A wet brine soaks the turkey in salted water, often with sugar and aromatics, for 12 to 24 hours. It adds some water weight but can make the skin soggy and the pan drippings too salty for gravy. A dry brine rubs salt directly on the bird, usually about three-quarters to one teaspoon of kosher salt per pound, and lets it rest uncovered in the refrigerator for one to three days. The salt draws moisture out, dissolves into it, and gets reabsorbed, seasoning the meat deeply. Meanwhile, the exposed skin dries out in the cold air of the fridge, which sets it up beautifully for crisp browning.
| Method | Time | Effect on Meat | Effect on Skin |
|---|---|---|---|
| Dry brine | 24 to 72 hours | Well seasoned, juicy, concentrated flavor | Dry, crisps easily |
| Wet brine | 12 to 24 hours | Seasoned, extra juicy, slightly spongy | Can stay wet, harder to crisp |
| No brine | None | Relies on cooking technique | Depends on drying |
Air-drying the skin
If you dry brine, leave the turkey uncovered on a rack set over a tray in the refrigerator for the last 12 to 24 hours. The cold, circulating air in the fridge dehydrates the skin so it turns taut and papery. This one trick makes covering less necessary because the skin starts the oven phase ready to brown.
Butter, oil, and aromatics
Loosen the skin over the breast gently with your fingers and slip softened butter, seasoned with herbs, between the skin and the meat. This bastes the breast from the inside as it melts. Rub the outside with a thin layer of oil or butter for browning. Stuff the cavity with aromatics such as halved onions, a lemon, garlic, and sprigs of thyme or sage. These perfume the meat lightly and do not need to be eaten.
Tying and trussing
Trussing the legs together with kitchen twine makes the bird compact and easier to handle, but it can slow heat from reaching the thigh joints. If you prefer evenly cooked dark meat, you can leave the legs loosely tied or simply tuck the wings under and skip the twine.
Bring it closer to room temperature
Take the turkey out of the refrigerator about 30 to 60 minutes before roasting. This does not meaningfully change safety but takes the chill off the surface and helps the bird cook slightly more evenly. Do not leave it out for hours.
Coarse kosher salt and a quality roasting rack are the foundation of crisp skin.
7. Choosing the Right Roasting Pan, Rack, and Tools
Your equipment quietly decides how well any covering strategy works. A flimsy pan warps and scorches drippings. A pan with sides that are too tall shields the lower half of the bird from airflow. A rack that is missing means the bottom of the turkey sits in its own juices and steams. Let’s walk through the gear that actually matters.
The roasting pan
Look for a heavy-gauge pan with sides about two to three inches high. Sides that are too high block circulating hot air from reaching the lower part of the bird, while sides that are too low let drippings spill and burn on the oven floor. Stainless steel, anodized aluminum, and enameled steel are all solid choices. If you are weighing materials, our breakdown of whether non-toxic cooking pans make sense for your kitchen is a good place to start, and a heavy stainless pan with an aluminum core is a dependable all-rounder for roasting.
| Pan Type | Strengths | Weaknesses | Covering Notes |
|---|---|---|---|
| Stainless steel with rack | Durable, great fond for gravy, works on stovetop | Heavier, can be pricey | Foil tents sit securely on the rim |
| Anodized aluminum | Even heating, lighter weight | Can warp with extreme heat | Good for hybrid roasting |
| Enameled steel | Affordable, easy cleanup | Chips over time, can burn drippings | Often sold with a lid |
| Disposable foil pan | Cheap, no cleanup | Flimsy, risk of buckling under a heavy bird | Support it with a sheet pan underneath |
| Cast iron skillet or Dutch oven | Excellent heat retention | Only suits smaller birds or pieces | Lid doubles as a cover |
The rack
A rack lifts the turkey off the bottom of the pan so hot air can circulate and the underside does not stew in fat. A V-shaped rack cradles the bird upright, while a flat rack works if you are roasting a spatchcocked turkey. If you do not own a rack, you can build a makeshift one from thick rings of onion, carrots, and celery stalks laid across the bottom of the pan. They will elevate the bird and flavor the drippings at the same time.
The thermometer
If you buy one new tool this year, buy a thermometer. An instant-read model gives you a quick spot check, while a leave-in probe with an alarm monitors the breast without you opening the oven door. Every time you open the door, you lose heat and extend the cook, so a probe that reports to a display outside the oven is a real convenience. Our guide to the best cooking thermometers lays out the options in detail.
Other useful tools
- Heavy-duty foil. For tenting and for wrapping wing tips.
- Silicone basting brush. Heat-resistant and easy to clean.
- Bulb baster. Helpful if you plan to baste with pan juices.
- Oven mitts or lifting handles. A twenty-pound turkey is heavy and slippery, so use sturdy gear.
- Carving board with a juice groove. Catches the juices after resting.
- Kitchen shears. Needed for spatchcocking and for trimming.
- Fat separator. Speeds up gravy-making dramatically.
Position in the oven
Place the oven rack in the lower third of the oven. This leaves ample room above the bird so the breast is not pressed against the top element. Make sure nothing else is in the oven that would block airflow. If you need to cook side dishes, plan to use the space after the turkey comes out to rest, when the oven is free.
A leave-in probe thermometer lets you watch the breast without opening the oven door.
8. Roasting Bags, Lids, and Electric Roasters: The Covered Methods Compared
Beyond foil, there are several dedicated covered cooking methods. Each creates a moist cooking environment, and each has its own strengths and quirks. If you are leaning toward a covered turkey, it is worth understanding how these tools differ from simply draping foil over the pan.
Oven roasting bags
A turkey roasting bag is a heat-safe plastic bag, usually made of nylon, that holds the bird and its juices during cooking. You add a spoonful of flour inside the bag to prevent bursting, place the turkey in, cinch the top, and cut a few slits in the bag so steam can escape. The result is tender, moist meat and almost zero cleanup. The trade-off is that the skin does not brown, and it can come out pale and soft. Some cooks slit the bag open for the last 20 to 30 minutes to let the skin color. This works reasonably well, but you will rarely match the crackle of an open roast.
Lidded roasting pans
A roasting pan with a domed lid works like a mini oven inside your oven. It traps heat and steam, shortens the cooking time slightly, and protects the breast. Many enameled roasters ship with lids and are a favorite for old-fashioned roasts. Lifting the lid for the last 30 to 45 minutes allows browning, and many cooks find the results remarkably juicy.
Electric roasters
Electric roaster ovens are large countertop appliances with lids, designed to cook a full turkey independently of your main oven. They are a lifesaver on holidays when oven space is precious. They hold temperature well and produce very moist meat. The compromise is limited browning, because the sealed environment retains steam. You can remove the lid near the end, then finish the bird in a hot conventional oven for ten to fifteen minutes to color the skin.
Dutch oven for smaller birds
A heavy Dutch oven can roast a small turkey or a bone-in breast beautifully. The thick lid acts as a cover, and the heavy walls hold heat. Begin covered to gently cook the meat and finish uncovered to brown the skin. It is a good method for small households that do not need a full-size bird.
| Method | Skin Result | Meat Moisture | Cleanup | Best Use |
|---|---|---|---|---|
| Foil tent (partial) | Good, mostly browned | Very good | Moderate | All-purpose roast |
| Full foil cover | Pale unless uncovered later | Excellent | Moderate | Large birds, cautious cooks |
| Roasting bag | Pale and soft | Excellent | Easiest | Convenience and cleanup |
| Lidded pan | Pale until lid removed | Excellent | Moderate | Classic braise-roast |
| Electric roaster | Pale, limited browning | Excellent | Moderate | Freeing up oven space |
| Uncovered | Best browning and crunch | Good with care | Most splatter | Presentation and flavor |
Why Choose a Covered Appliance
- Very forgiving, juicy meat
- Frees up your main oven
- Less smoke and splatter
- Simple to manage for big groups
What You Give Up
- Crisp skin without extra effort
- Deeply roasted flavor
- Strong pan drippings for gravy
- The classic centerpiece look
A smart workaround for pale skin
If you roast in a bag, a lidded pan, or an electric roaster, you can rescue the skin with a quick finish. Carefully transfer the cooked turkey to a rack on a sheet pan, pat the skin dry with paper towels, brush with melted butter, and slide it under a hot oven set to 450°F for ten to fifteen minutes. Watch it closely, because the skin goes from pale to burnt quickly. Alternatively, a very careful pass with a kitchen torch can brown stubborn spots.
Turkey-size oven roasting bags and electric roasters take pressure off your main oven.
9. Temperature and Timing: How Long to Cook a Covered or Uncovered Turkey
Covering or not covering changes timing a little, but the central rule is the same: trust your thermometer rather than the clock. The numbers below are a starting point for planning your day, not a guarantee. Ovens vary, birds vary, and the temperature of the bird when it goes in varies, so always verify with a probe.
Target internal temperatures
The safe minimum internal temperature for turkey is 165°F (74°C), measured in the thickest part of the breast, the innermost part of the thigh, and the innermost part of the wing. The thigh is the best place to take your most important reading because it is the last part to finish. If you want a refresher on how poultry safety temperatures work across birds, our article on the safe temperature for cooking chicken covers the same principles.
| Part of the Turkey | Safe Minimum | Many Cooks Aim For | Notes |
|---|---|---|---|
| Breast | 165°F (74°C) | Pull around 160°F, carryover finishes it | Overcooking dries it quickly |
| Thigh | 165°F (74°C) | 175°F to 180°F | Higher temps break down collagen |
| Wing | 165°F (74°C) | 165°F to 170°F | Thin, check early |
| Stuffing inside cavity | 165°F (74°C) | 165°F minimum | Check the center of the stuffing |
General timing guide
These estimates assume an unstuffed, fully thawed turkey roasted at 325°F in a conventional oven. Stuffed birds typically need additional time, and convection ovens may shave off 15 to 25 percent.
| Turkey Weight | Approximate Roasting Time |
|---|---|
| 8 to 12 pounds | About 2 hours 45 minutes to 3 hours |
| 12 to 14 pounds | About 3 to 3 hours 45 minutes |
| 14 to 18 pounds | About 3 hours 45 minutes to 4 hours 15 minutes |
| 18 to 20 pounds | About 4 hours 15 minutes to 4 hours 30 minutes |
| 20 to 24 pounds | About 4 hours 30 minutes to 5 hours |
How covering affects the clock
A fully covered bird often cooks a little faster because steam transfers heat more efficiently than dry air. A tented breast slows only the white meat, so overall time changes little, but the breast temperature rises more gently. A bag or lidded roaster can trim the total time by 20 to 30 minutes. If you are following a recipe written for an uncovered turkey and you use a cover, begin checking the temperature earlier than the recipe suggests.
Carryover cooking
A large roast keeps climbing in temperature after leaving the oven, typically by five to ten degrees as the hot exterior equalizes with the cooler center. For a turkey this means pulling the bird slightly before it reaches your final target. If you want a breast at 165°F after resting, pulling it out at about 157°F to 160°F is reasonable, and the thigh will usually keep rising into the safe zone as well. Always confirm with a final temperature check before carving.
Where to insert the probe
- Thigh: Insert into the thickest part, angled toward the body, without touching the bone.
- Breast: Insert from the neck end, parallel to the bone, into the thickest area.
- Wing: Slide the probe into the joint where the wing meets the body.
Cooking by feel as well as by number
Numbers matter, but your senses add useful information. When the turkey is close to done, the juices that run from the thigh when pierced should be clear rather than pink, the drumstick should wiggle freely in its joint, and the skin should look taut, golden, and dry. These cues do not replace a thermometer, but they confirm what the probe tells you, and they help you notice trouble early, such as a thigh that is still stubbornly firm.
Plan your schedule backward from dinnertime. Add the roasting time, then at least 30 to 40 minutes for resting, then a cushion of 30 minutes for surprises. If the bird is finished early, that is never a problem, since a rested turkey stays hot for a long time under a loose tent. If it finishes late, you have already built in the buffer to absorb it. This one planning habit does more to lower holiday stress than any gadget.
Fast digital thermometers read in seconds and make timing decisions easy.
10. Resting and Carving: The Step That Decides Juiciness
Many cooks spend days planning the roast and then ruin it in the final ten minutes by carving too soon. Resting is the quiet hero of turkey cooking. Whether you covered the bird or not, this step is where moisture redistributes, temperatures even out, and the meat becomes tender and sliceable.
Why resting works
During roasting, the muscle fibers in the turkey tighten and push moisture toward the center. If you cut into the bird right away, those juices pour out onto the board instead of staying in the meat. Resting lets the fibers relax and the juices disperse again. The result is meat that stays moist from the first slice to the last. For a detailed look at timing, see our guide on how long a turkey should rest after cooking.
How long to rest
| Turkey Size | Suggested Rest | Notes |
|---|---|---|
| Under 12 pounds | 20 to 30 minutes | Cover loosely with foil |
| 12 to 18 pounds | 30 to 40 minutes | Keeps hot well, plenty of time to finish sides |
| Over 18 pounds | 40 to 50 minutes | Large bird stays warm a long time |
Cover during resting, but gently
Here is the one place where covering is almost universally recommended. After the turkey comes out of the oven, tent it loosely with foil while it rests. This holds warmth without steaming the skin the way a tight cover would. Do not wrap it tightly, and do not cover it with a towel that could press against crisp skin. A loose tent is enough to keep the bird hot for the length of the rest, and a big turkey holds its heat remarkably well.
Use the rest to finish the meal
The resting window is the perfect opportunity to make gravy from the pan drippings, warm the rolls, mash the potatoes, and bake any side dishes that need the oven. With the turkey out of the way, you finally have the oven space and a calm moment to get the rest of the table ready.
Carving without destroying the skin
- Remove the legs first. Cut through the skin between the leg and the breast, pop the joint, and slice through to detach the whole leg and thigh.
- Separate drumstick and thigh. Cut through the joint and slice the thigh meat off the bone.
- Take off the wings. Cut through the joint where each wing meets the body.
- Remove the breast. Slice along one side of the breastbone down to the rib cage, lifting the whole breast half off in one piece.
- Slice across the grain. Cut the breast into thick slices against the grain for tender bites.
Resting principles apply broadly in cooking, and they matter just as much with other proteins. If you want to see the same idea applied elsewhere, read our piece on how long steak should rest after cooking.
Storing leftovers safely
Once dinner is over, do not leave the turkey sitting out. Carve the remaining meat off the bones and refrigerate it within two hours in shallow containers so it cools quickly. Properly stored, leftover turkey keeps for three to four days in the refrigerator, and it freezes well for a few months. Reheat portions to 165°F, and add a little broth to the container before warming so the meat stays moist. Save the carcass for stock, which turns a few simple vegetables and an hour or two of simmering into a rich base for soups.
A sharp carving knife and a juice-groove board make slicing clean and tidy.
11. Common Turkey Covering Mistakes (and How to Fix Them)
Most turkey disasters come from a short list of repeated errors. Here are the most common ones related to covering, and the simple fix for each.
Mistake 1: Sealing the foil tightly against the skin
A tight foil wrap presses against the skin and traps steam directly on it, producing a wet, pale surface. Fix: Tent loosely, leaving a pocket of air between the foil and the bird, and oil the underside of the foil so it does not stick.
Mistake 2: Tenting too early or too late
Tent too early and the skin never colors. Tent too late and the damage is done. Fix: Watch the color. When the breast reaches a golden shade you like, put the foil on.
Mistake 3: Forgetting to uncover at the end
It is easy to leave the foil on and forget about it, and you end up with soggy skin. Fix: Set a timer to remember to remove the tent for the last 20 to 30 minutes.
Mistake 4: Relying on the pop-up timer
Pop-up indicators often trigger late, after the breast is already dry. Fix: Discard it and rely on a thermometer.
Mistake 5: Opening the oven door too often
Every peek drops the oven temperature, lengthens the cooking time, and disrupts browning. Fix: Use a leave-in probe and only open the door when you plan to tent, rotate, or baste.
Mistake 6: Basting too much
Constant basting adds moisture to the skin surface, which fights browning, and each opening of the oven cools the cavity. Fix: Baste sparingly, or not at all. Butter under the skin and a dry, well-seasoned surface do much of the work for you.
Mistake 7: Skipping the rest
Carving immediately lets precious juices escape. Fix: Rest the turkey at least 20 to 30 minutes, loosely covered.
Mistake 8: Crowding the pan with vegetables
Packing the pan with raw vegetables releases moisture and creates steam around the bird, softening the skin. Fix: Use a modest amount of aromatics or roast vegetables separately.
Mistake 9: Cooking a partially frozen bird
A turkey that is still icy in the center cooks unevenly, and the outside can be overdone long before the inside is safe. Fix: Make sure the bird is completely thawed, checking inside the cavity for ice crystals.
Troubleshooting guide
| Problem | Likely Cause | Solution |
|---|---|---|
| Skin browning too fast | Oven runs hot or bird too close to the element | Tent with foil and lower the rack |
| Pale, soft skin | Covered too long or wet skin | Uncover and raise heat for the last 30 minutes, or finish under high heat |
| Dry breast | Overcooked or no protection | Pull earlier, tent the breast, and rest properly |
| Undercooked thighs | Legs not reaching temperature | Return to the oven, shield the breast, and keep cooking |
| Burnt wing tips | Thin parts exposed to direct heat | Wrap tips in small foil pieces |
| Smoking oven | Fat burning in the pan | Add a little water or broth to the pan bottom |
| Foil stuck to skin | Foil not oiled | Oil the underside of the foil before tenting |
Rescue plans on the day
If the turkey is cooked but the skin is pale, finish it under high heat as described earlier. If the breast is done but the thighs are not, carve the bird into parts and return the legs to the oven while the breast rests. If the turkey is running late, cut it into pieces and roast them on a sheet pan to speed things up. A cooked bird that is carved can also be held in a warm oven at a low temperature, with a splash of broth and a loose foil cover to keep it moist. The fact that you can rescue a turkey in so many ways is proof that a bit of foil is a tool, not a rule.
A rimmed sheet pan and a fat separator solve most turkey-day emergencies.
12. Special Cases: Spatchcock, Turkey Breast, Smoked, Fried, and Stuffed
The covering question changes depending on how you cook the bird. Here is how to adapt the advice for the most popular variations.
Spatchcocked turkey
Spatchcocking means removing the backbone and flattening the bird. A flat turkey cooks quickly and evenly, often in roughly half the time of a traditional roast, because the thick breast and the legs sit at the same level. With this method, covering is rarely needed. The bird is exposed on a rack set over a sheet pan, the skin crisps beautifully, and everything finishes around the same time. If the breast browns too fast, a light foil shield will do. Roasting at about 425°F is common, and you should still watch the thighs for a final temperature of 175°F or more.
Turkey breast only
A bone-in turkey breast is a good option for small gatherings. Because it is all white meat, it dries out easily, so starting covered with a loose foil tent for the first half of cooking, then uncovering to brown, is a smart plan. Cook to about 160°F in the thickest part and rest before carving.
Stuffed turkey
Stuffing inside the cavity makes the bird take longer, and the stuffing must reach 165°F in the center to be safe. That extended time makes covering the breast more important, since it will be in the oven longer. Many cooks prefer to bake the stuffing in a separate dish for faster, safer, and crispier results, and it also shortens the turkey’s cooking time.
Smoked turkey
Smoking is typically done uncovered because you want the smoke to reach the skin and the meat. The cooking temperature is lower, often 250°F to 275°F, and the skin can turn rubbery unless you finish at higher heat. If your smoker runs hot on the top rack, a foil shield over the breast helps. Avoid wrapping tightly, which blocks smoke and softens the bark.
Deep-fried turkey
A fried turkey is never covered. The bird goes into hot oil, and the skin crisps in minutes. Deep frying demands great caution: the turkey must be fully thawed and dry, the pot must have enough room to avoid overflow, and the fryer must be used outdoors on a flat, stable surface, well away from structures. Once you are done, you will need to dispose of a large volume of oil, and our guide on how to dispose of cooking oil explains how to do it safely and responsibly.
Grilled or rotisserie turkey
On a covered grill using indirect heat, the grill lid acts as your oven. You can still tent the breast with foil if the top browns too fast. On a rotisserie, the constant rotation bastes the bird in its own juices and promotes even browning, so no foil is usually needed.
Cheesecloth-wrapped turkey
Some cooks soak cheesecloth in melted butter and drape it over the breast. It protects the meat and bastes it as the butter melts. The cloth browns and can be removed near the end for final crisping. It is a classic technique that gives a rich flavor and a slightly delicate skin.
Comparing the variations
| Style | Cover? | Typical Temperature | Key Tip |
|---|---|---|---|
| Traditional roast | Tent when browned | 325°F to 350°F | Uncover for the final stretch |
| Spatchcock | Usually not | About 425°F | Use a rack on a sheet pan |
| Turkey breast | Cover first half | 325°F | Pull near 160°F |
| Stuffed bird | Tent the breast | 325°F | Stuffing must reach 165°F |
| Smoked | No, shield only if needed | 250°F to 275°F | Finish hot for crisp skin |
| Deep-fried | Never | Oil at roughly 350°F | Thaw fully and fry outdoors |
From poultry shears to a turkey fryer kit, find the right tool for your method.
Frequently Asked Questions About Covering a Turkey
Do you cover a turkey when cooking it?
Most cooks roast uncovered for the first part of the cook to build browning, then tent the breast loosely with foil if it darkens too quickly. Fully covering the bird keeps the meat moist but produces pale, soft skin unless you remove the cover for the last 30 to 45 minutes.
Should I cover a turkey with foil for the entire cooking time?
Generally no. Keeping foil on the whole time traps steam, which prevents the skin from crisping. If you start covered, remove the foil for the final 45 minutes to an hour to let the skin brown.
When should I put foil on my turkey?
Add a loose foil tent once the breast reaches a nice golden color, typically after the first 1 to 1.5 hours of roasting. If it browns faster, tent sooner.
Does covering a turkey make it cook faster?
A fully covered turkey may cook slightly faster because steam transfers heat efficiently, while a breast tent mostly slows the white meat. Use a thermometer rather than the clock to decide when it is done.
What temperature should a turkey be cooked to?
The safe minimum is 165°F (74°C) in the thickest part of the breast, the innermost part of the thigh, and the innermost part of the wing. Many cooks take thighs to 175°F to 180°F for better texture.
Should the foil be shiny side up or down?
It makes little practical difference in home ovens. What matters more is that the foil is loose, that it is oiled where it touches the skin, and that you remove it in time for browning.
How do I keep a turkey moist without covering it?
Dry brine for one to three days, rub butter under the skin, roast at a steady 325°F, avoid overcooking by pulling the breast near 160°F, and rest the bird properly before carving.
Should I baste the turkey?
Basting is optional. It adds some color and flavor but can make the skin wetter, and every oven opening reduces heat. If you baste, do it sparingly with melted butter or pan juices.
Do I add water to the roasting pan?
A small amount of broth or water in the bottom of the pan can prevent drippings from burning, but too much creates steam that softens the skin. A cup or two is usually plenty.
Should I cover a turkey while it rests?
Yes, but loosely. A light foil tent keeps the bird warm without trapping so much steam that the skin turns soggy. Rest it for 20 to 40 minutes before carving.
Can I use a roasting bag and still get crispy skin?
Roasting bags produce very moist meat but pale skin. You can open or slit the bag for the last 20 to 30 minutes, or finish the bird in a hot oven for ten to fifteen minutes to crisp the skin.
Is it safe to cook a turkey at a low temperature?
Cooking at 325°F or higher is the standard recommendation. Very low temperatures keep the bird in the danger zone for longer, so follow recommended guidelines and always verify the final internal temperature.
Conclusion: So, Do You Cover a Turkey When Cooking?
The honest answer is: sometimes, and only as much as the bird needs. A turkey roasted entirely under a tight foil cover tends to come out moist but pale and a little steamed. A turkey roasted entirely bare delivers glorious skin but carries a higher risk of dry breast meat. The approach that works best for the largest number of cooks sits in the middle: start uncovered for color, tent the breast loosely when it browns, remove the tent near the end to crisp the skin, and always, always rest the bird before carving.
Pair that method with a dry-brined, well-dried bird, a sturdy pan and rack, and a trustworthy thermometer, and you have nearly everything you need for a memorable turkey. The foil is a helpful tool, but it is not the main character. Temperature control, good seasoning, and patience with the rest are what separate a respectable turkey from an unforgettable one.
Whichever method you choose, give yourself time, keep your thermometer close, and trust what you see in the oven. A bit of attention goes a long way, and the compliments at the table will make it worth it.
Browse top-rated roasting pans, thermometers, and carving tools in one place.