How to Clean a Wine Decanter: The Complete Guide to Sparkling Glass
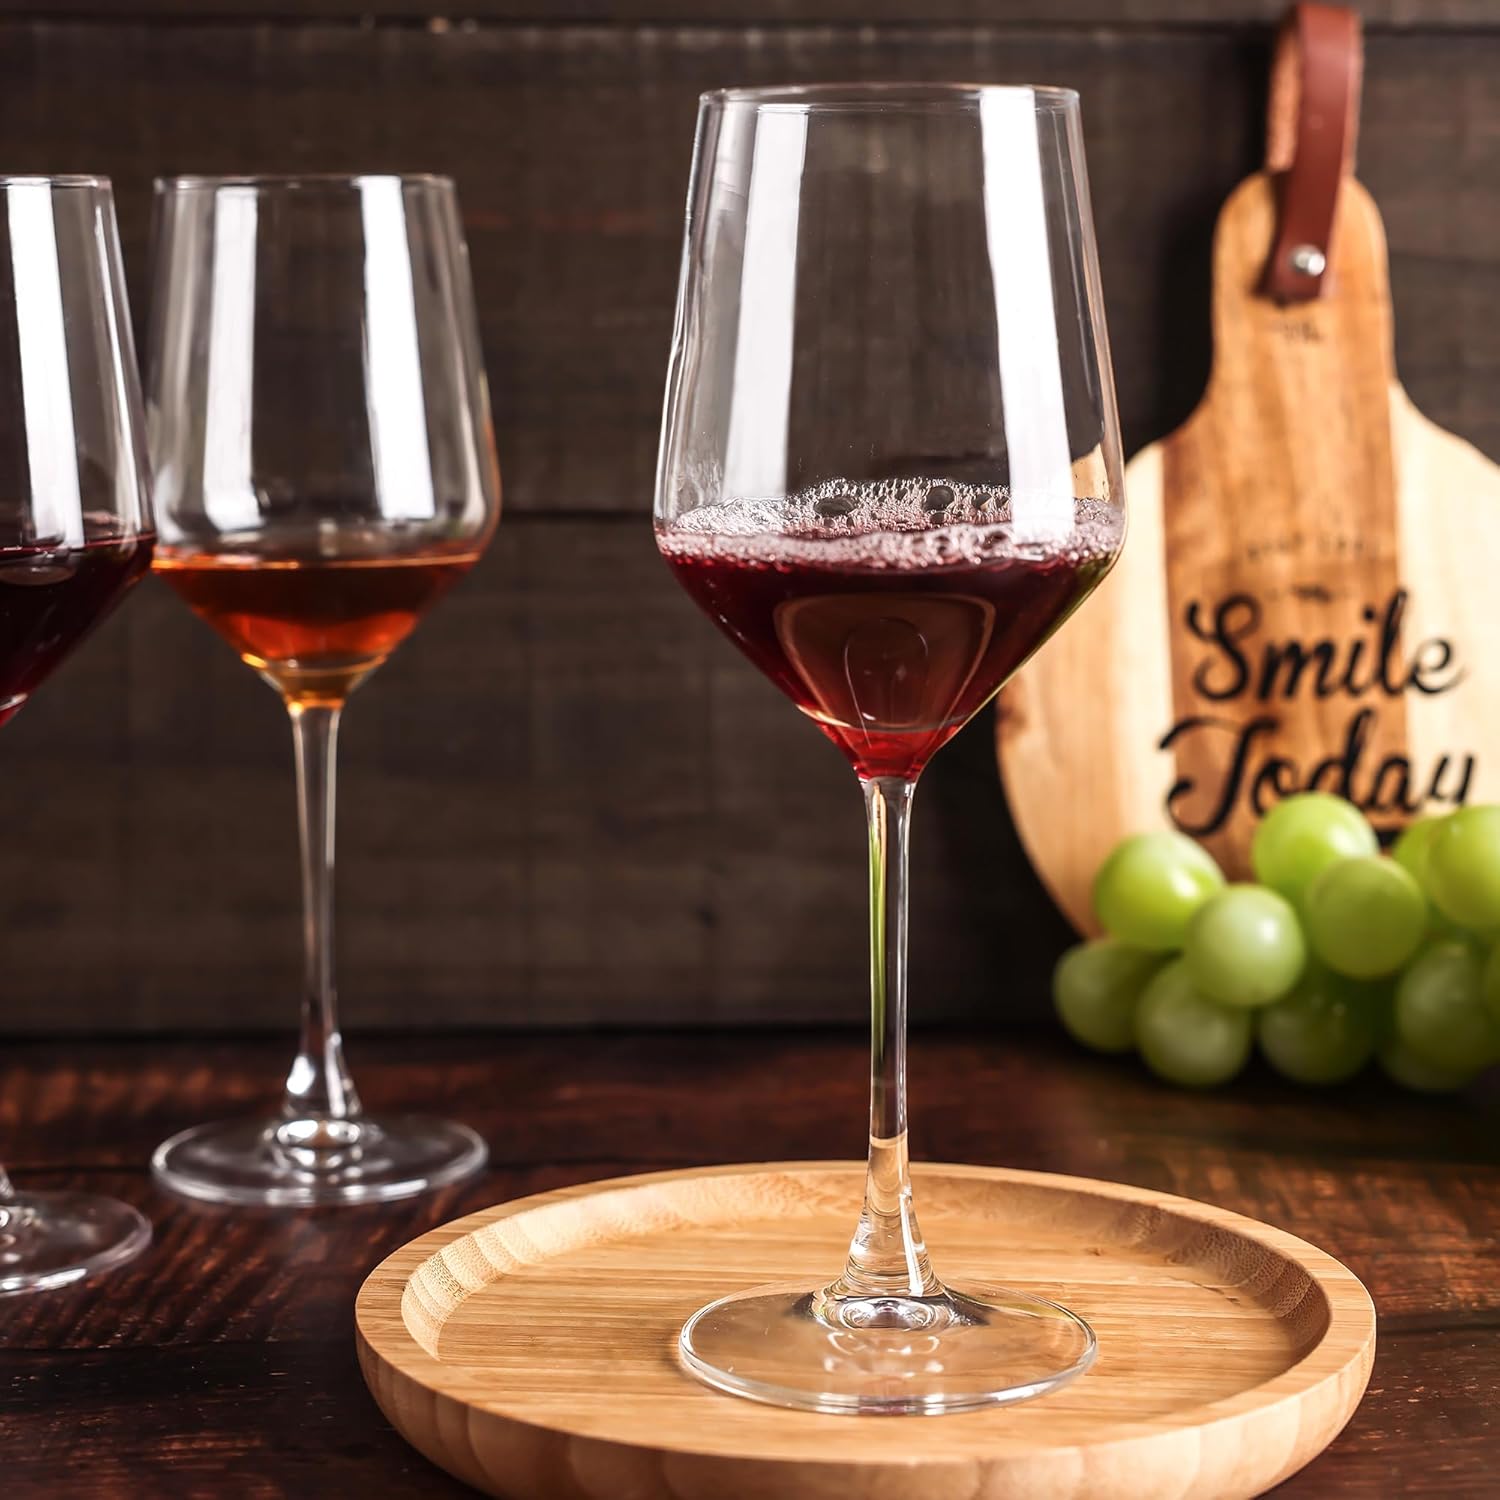
There are few things more elegant than pouring a vintage Cabernet from a beautiful crystal decanter. It aerates the wine, separates the sediment, and adds a touch of sophistication to your dinner party. But let’s be honest: the morning after, that beautiful vessel turns into a nightmare.
Purple rings stain the bottom. A cloudy film coats the sides. And the shape — often with a wide base and an impossibly narrow neck — makes it seem like you need a degree in engineering just to get a sponge inside. If you have ever stared at a dirty decanter and considered throwing it away rather than cleaning it, you are not alone.
Maintaining your glassware does not have to be a struggle. In this comprehensive guide, we will walk you through every effective method for how to clean a wine decanter, from quick daily rinses to deep-cleaning hacks for the most stubborn stains. We will cover the tools you need, the mistakes you must avoid, the chemistry behind the stains, and everything else you need to know to keep your crystal sparkling for decades.

Why Decanters Get Stained (And Why It Matters)
Before we clean, it helps to understand the enemy. Red wine is rich in tannins and anthocyanins (pigments). As the wine sits in the decanter, exposure to oxygen causes these compounds to polymerize and settle. If you want to dive deeper into the science, read our article on what is tannin in wine.
Furthermore, older wines drop sediment (tartrates and color solids). If left overnight, this sediment dries and bonds to the crystal surface. Over time, mineral deposits from hard water can also create a cloudy “film” on the glass. A dirty decanter is not just ugly — old residue can impart off-flavors to your fresh wine, ruining the experience of that expensive bottle you have been storing properly.
The Chemistry of Wine Stains: Know Your Enemy
A wine stain is not a single substance — it is a cocktail of organic and inorganic compounds, each requiring a slightly different approach to remove. Understanding the chemical nature of what you are dealing with explains why certain cleaning methods work for certain stains and why others fail completely.
Anthocyanins (Red Pigments)
The vivid purple and crimson color in red wine comes from anthocyanins — water-soluble plant pigments found in grape skins. When wine first hits the glass, these pigments are relatively easy to rinse away with warm water. The problem is time. As anthocyanins dry and oxidize, they bond with the glass surface more strongly, transitioning from a soluble pigment into an oxidized polymerized compound that water alone cannot lift. This is why the single most effective decanter care rule is rinsing within minutes of emptying the vessel — before the anthocyanins complete their oxidation and bond permanently.
Warm or near-hot water alone will dissolve recently deposited anthocyanins effectively because heat increases the solubility of these compounds. For dried or aged anthocyanin stains, you need either mechanical abrasion (beads, salt, ice) or a mild acid (white vinegar) to break the bond between the oxidized pigment and the glass surface.
Tannins
Tannins are polyphenolic compounds — long chain molecules that bind to proteins, which is why they create that dry, astringent sensation in your mouth. They bind to glass surfaces through similar mechanisms. Young tannins are relatively water-soluble; aged tannins that have polymerized through extended exposure to oxygen become significantly more resistant to simple water rinsing. In a decanter that has been used repeatedly for tannic red wines without thorough cleaning, tannin deposits accumulate in microscopic layers, darkening gradually and eventually creating the characteristic brown ring around the base of the bowl.
Alkaline cleaning agents (baking soda in water is mildly alkaline) are particularly effective on tannin deposits, as the alkalinity disrupts the polyphenol-glass bond and helps the compounds re-enter solution for rinsing away.
Tartrates (Wine Crystals)
Tartaric acid is the primary acid in wine. At cold temperatures or when wine is left sitting for extended periods, tartaric acid can precipitate as potassium hydrogen tartrate — what you see as harmless but stubborn white or cream-colored crystals on the inside of the decanter. These are more common if you have been storing wine in a cold environment and then decanting it, or if you use your decanter for white wine with high tartaric acid content.
Tartrate crystals are actually relatively easy to dissolve — they are soluble in warm water and particularly responsive to mild acid treatment. A vinegar soak that might require 20 minutes for anthocyanin stains will dissolve tartrate deposits in as little as 5 to 10 minutes.
Limescale (Calcium and Magnesium Deposits)
This is not from the wine — it is from your tap water. Hard water contains dissolved calcium and magnesium bicarbonates, which deposit as a white, chalky scale wherever water evaporates. In a decanter that is air-dried upright without a stand, these minerals concentrate in a ring at the waterline as the water evaporates. Hard water limescale requires acid to dissolve it — specifically white vinegar (acetic acid) or citric acid — since the carbonates react with acid to release CO₂ and dissolve into solution. This is why the vinegar method is so effective for cloudy decanters — it is often limescale, not wine residue, causing the opacity.
Anthocyanins and tannins respond best to mechanical cleaning (beads, salt, brushes) combined with warm water. Limescale and tartrates respond best to acid treatment (white vinegar). Persistent organic buildup responds best to alkaline treatment (baking soda) or effervescent action (denture tablets, baking soda + vinegar). Match your method to the stain type.
Crystal vs Glass vs Lead-Free Crystal: What You Own and Why It Matters
The material your decanter is made from determines how aggressively you can clean it, which chemicals are safe to use, and what temperature ranges are acceptable. Many decanter owners do not know what their vessel is actually made of — and using the wrong cleaning approach for the wrong material can cause irreversible damage.
Standard Glass
Standard glass decanters (also called soda-lime glass) are made from the same basic material as bottles and everyday glassware. They are non-porous, chemically neutral, and relatively hard — meaning they resist etching and chemical attack better than crystal. Standard glass decanters are typically dishwasher-safe (though the narrow neck still prevents proper cleaning by machine), and they tolerate mild dish soap without absorbing residue. They are less prone to permanent cloudiness than crystal. The tradeoff is aesthetics — standard glass is optically less brilliant than crystal and tends to be thicker-walled.
Lead Crystal
Traditional crystal contains lead oxide (typically 24–30% by weight), which gives it exceptional optical brilliance, a distinctive ring when tapped, and workability that allows very thin walls. However, lead crystal is porous at a microscopic level — more so than standard glass — and this porosity means it can absorb wine pigments, soap residue, and chemical cleaners more readily. Never use bleach or harsh chemical cleaners on lead crystal. Never use it for very long-term wine storage (the lead can leach into wine over extended contact periods). And never put it in the dishwasher — the combination of hot water and alkaline detergent causes irreversible etching and the loss of optical clarity within a single cycle.
Lead crystal decanters require the gentlest cleaning approach: warm water, beads or soft brush, and vinegar for limescale — nothing harsher.
Lead-Free Crystal
Modern premium decanters from brands like Riedel, Zalto, Schott Zwiesel, and Spiegelau use lead-free crystal formulations — typically replacing lead oxide with barium oxide, titanium oxide, or zinc oxide. These materials achieve similar optical clarity and workability to lead crystal without the porosity and toxicity concerns. Lead-free crystal is still significantly more sensitive than standard glass and should be treated with the same care: hand wash only, warm water, no harsh chemicals. However, it is somewhat more resistant to etching than lead crystal and tolerates the baking soda and vinegar methods safely.
| Material | Porosity | Dishwasher Safe? | Vinegar Safe? | Soap Safe? | Best Cleaning Method |
|---|---|---|---|---|---|
| Standard Glass | Non-porous | Usually yes (neck caveat) | Yes | Yes (small amount) | Beads + warm water; soap acceptable |
| Lead Crystal | Slightly porous | Never | Yes (diluted) | Sparingly | Warm water + beads; vinegar for limescale |
| Lead-Free Crystal | Minimal | Never (unless stated) | Yes | Sparingly | Beads, baking soda, vinegar, denture tablets |
How to Clean by Decanter Shape: A Shape-by-Shape Guide
Wine decanters come in a remarkable variety of shapes, and the cleaning approach needs to adapt to each. The flat-bottomed standard decanter is the easiest to clean; an ornate swan-neck or ship decanter can be genuinely challenging. Here is a practical guide to tackling each major shape.
Standard Bordeaux Decanter (Wide Base, Straight Neck)
The most common and most forgiving shape. The relatively straight neck allows a long-handled decanter brush to reach the interior base, and the wide bowl gives cleaning beads plenty of room to swirl. For this shape, any of the seven methods covered in this guide will work effectively. A flexible brush combined with beads in warm water is the most thorough approach. Rinse by filling and swirling three times with clean warm water.
Duck or Ship Decanter (Horizontal Vessel)
The horizontally oriented “duck” and “ship” decanters — popular for their dramatic table presence — are among the most challenging shapes to clean because gravity does not help the water reach the far end of the vessel. Cleaning beads are essential here, as they roll along the entire interior length of the vessel under gentle agitation. Fill with warm water, add a generous measure of beads, and rotate the decanter along its horizontal axis rather than swirling — this ensures the beads traverse the full length of the interior. A vinegar soak works well for limescale in these vessels, as the acid reaches all surfaces regardless of orientation. Brushes are largely ineffective for duck decanters unless the neck is very wide.
Swan-Neck or Curved Decanter
The elegantly curved swan-neck decanters present the challenge of getting cleaning tools around a sharp internal curve. Beads handle this naturally — they follow the curved interior surface under gravity and agitation. Denture tablets and the baking soda-vinegar fizz method are also excellent for swan-neck shapes because the chemical action works without requiring physical contact with the stain. For these shapes, extend the soak time to 45 minutes to an hour to allow the chemistry to reach deeply curved areas.
Mallet or U-Shaped Decanter
These wide-based, U-profile decanters have a broad flat base connected by curved sides to a relatively short neck. Their wide base means a large staining area but easy access for beads and for pouring cleaning solutions. The primary challenge is removing all water after cleaning — tilt and rotate the vessel repeatedly during rinsing to ensure no standing water remains in the wide base before drying.
Small-Format or Mini Decanter
Single-serve decanters (typically 375ml capacity) are easier to clean than full-size models due to their smaller interior volume and lighter weight. However, their narrow necks in relation to bowl size mean that beads may not move freely. For mini decanters, the sparkling water method, vinegar soak, and denture tablet method are the most practical. A mini decanter brush — most long-handled brush sets include a small attachment — handles the interior surface directly.
Whiskey Decanter (Straight-Sided with Stopper)
Whiskey and spirits decanters are typically straight-sided with a wide mouth and a ground-glass stopper. These are among the easiest shapes to clean because their wide openings allow direct access with a brush or cloth. The most important consideration for spirits decanters is the stopper — clean it separately by soaking in a diluted vinegar solution, then dry completely before reinserting, as a damp stopper creates the perfect conditions for musty odors. Never store spirits in a decanter with a ground-glass stopper long-term, as the alcohol can eventually fuse the stopper to the neck through gradual drying of any wine or spirit film at the contact point.
For any unusually shaped decanter where you are unsure about cleaning bead compatibility, check the manufacturer’s care instructions specifically. Some very thin-walled sculptural decanters are not rated for steel beads — the manufacturer will usually state this. When in doubt, use the chemical methods (vinegar, denture tablets, baking soda) which clean effectively without any physical contact with the glass surface.
3 Golden Rules of Cleaning Crystal
Most high-end decanters are made of lead-free crystal. This material is durable but requires specific care.
1. Avoid Dish Soap (Mostly)
It sounds counterintuitive, but soap is the enemy of decanters. It is incredibly difficult to rinse completely out of a vessel with a narrow neck. Any residue left behind will leave a soapy film that kills the aroma of your next wine. Use soap only as a last resort and use fragrance-free versions in very small quantities, always followed by at least five thorough warm-water rinse cycles.
2. No Sudden Temperature Changes
Crystal is sensitive to thermal shock. Never rinse a cold decanter with hot water, and never use boiling water to clean it. The temperature differential between a room-temperature or cold decanter and very hot water can create localized stress fractures that either crack the glass immediately or weaken it progressively. Always use lukewarm to warm water — comfortably warm to the touch, not scalding.
3. Rinse Immediately
The best way to clean is prevention. The moment the dinner party ends, rinse the decanter with warm water. Do not let the wine dry overnight. A one-minute immediate rinse after emptying will prevent 90% of the staining that creates the need for deep cleaning in the first place.
Method 1: Cleaning Beads (The Best Way)
If you own a decanter with a unique shape, you need mechanical friction to scrub the inside walls. Since your hand will not fit, stainless steel cleaning beads are the industry standard solution. Professional sommeliers and glassware manufacturers including Riedel recommend this approach as the primary cleaning method for all but the most delicate decanters.
- Fill: Pour a small amount of warm water into the decanter — enough to give the beads something to move through, but not so much that you cannot swirl them effectively.
- Pour: Carefully pour the stainless steel pellets into the decanter, holding the vessel at an angle so the beads roll gently down the side rather than dropping straight into the base — a sudden impact from a height can crack thin crystal.
- Swirl: Gently swirl the decanter in a circular motion. The beads roll over the glass surface, physically scrubbing away red wine stains and sediment without scratching the glass.
- Empty: Pour the beads into a mesh strainer — never down the sink. Rinse the beads thoroughly, allow them to dry completely, and store them for next use.
- Rinse: Rinse the decanter thoroughly with warm water, swirling three to five times until the water runs completely clear.
For particularly stubborn stains, add a tablespoon of coarse salt to the water before adding the beads — the salt acts as an additional mild abrasive that enhances the mechanical cleaning action.

Method 2: Vinegar & Salt (The Pantry Hack)
If you do not have cleaning beads, you can use items from your kitchen. This method uses acid to break down stains and salt as an abrasive — mimicking, in a pantry-accessible way, the combined chemical and mechanical action of the bead method.
- Acid Bath: Pour white vinegar into the decanter (about one cup) and dilute with some warm water. Let it sit for 15 to 20 minutes to loosen mineral deposits and begin breaking down tannin and anthocyanin stains.
- Add Abrasive: Add a handful of coarse salt (Kosher salt works best) or uncooked rice.
- Shake: Swirl the mixture vigorously. The salt or rice acts as a scouring agent to scrub the sides. Keep agitation controlled — aggressive shaking can stress thin crystal.
- Rinse: Dump the mixture and rinse repeatedly with warm water until the vinegar smell is completely gone. This typically requires four to six rinse cycles.
Note: Be careful with rice; if it gets stuck in the neck and absorbs water while trapped inside, it expands and can be very difficult to remove. If this happens, immediately fill the decanter with warm water to begin softening the rice, and use a thin flexible brush or chopstick wrapped in cloth to dislodge it gently.
Method 3: Denture Tablets (The Deep Clean)
For neglected decanters with stubborn, dried-on purple rings, you need chemical action. Surprisingly, denture cleaning tablets (like Polident or Efferdent) work remarkably well here. They contain a combination of mild abrasive agents, effervescent sodium bicarbonate, and cleaning compounds specifically designed to lift organic stains from porous surfaces — which makes them nearly ideal for wine residue in glass.
- Fill: Fill the decanter with warm water past the stain line.
- Drop: Drop in one or two denture cleaning tablets.
- Wait: Let it fizz and soak for at least 30 minutes, or overnight for very bad stains. The effervescence physically lifts sediment while the cleaning compounds dissolve organic residue.
- Rinse: Rinse thoroughly with multiple warm-water cycles until no tablet residue or odor remains.
Alternatively, specialized wine cleaning products often use similar oxygen-based effervescent formulas designed specifically for wine glassware.
Method 4: Baking Soda & Vinegar Fizz (The Powerhouse)
This method harnesses two pantry staples simultaneously to create a powerful fizzing action that lifts stains from even the most neglected decanters. The combination of baking soda (a mild alkali) and white vinegar (an acid) creates an immediate, vigorous effervescent reaction — releasing carbon dioxide bubbles that physically agitate and lift staining compounds from the glass surface. This is the preferred deep-clean method for decanters that have developed significant buildup from multiple uses without thorough cleaning.
- Start with baking soda: Add two generous tablespoons of baking soda directly to the decanter.
- Add warm water: Pour in approximately half a cup of warm water and swirl gently to dissolve the baking soda and wet all interior surfaces.
- Add vinegar: Pour in equal parts of undiluted white vinegar. The mixture will immediately begin fizzing vigorously — hold the decanter over the sink as the foam can rise.
- Swirl and soak: Gently swirl to distribute the fizzing reaction across all stained surfaces. Let it sit for 20 to 30 minutes for moderate stains, up to two hours for severely stained decanters.
- Rinse thoroughly: Rinse with multiple warm-water cycles until completely clear and odor-free. The baking soda and vinegar rinse away easily and leave no flavor residue.
Baking soda is mildly alkaline and effective at breaking down the tannin-glass bond, while vinegar’s acidity dissolves limescale and tartrate deposits simultaneously. The CO₂ fizzing provides mechanical agitation without requiring any abrasive tool inside the decanter. This makes it particularly well-suited to delicate or ornate shapes where beads and brushes cannot easily reach.
Method 5: Crushed Ice & Salt (The Sommelier Shake)
This is the method recommended by professional sommeliers at restaurants who need to clean decanters quickly between services. It requires no special tools, no waiting time, and is extraordinarily effective for fresh stains — making it the ideal same-night cleaning method after a dinner party.
- Add crushed ice: Fill the decanter approximately one-quarter full with crushed ice (not cubed ice — crushed ice has more surface area and gentler individual pieces). If you only have cube ice, place cubes in a zip-lock bag and crush them with a rolling pin.
- Add coarse salt: Add two to three tablespoons of coarse Kosher salt or rock salt. The salt enhances the abrasive action of the ice.
- Shake with control: Holding the decanter securely with both hands — one on the base, one around the bowl — shake with a controlled, rolling motion that drives the ice and salt across all interior surfaces. “Put some hip into it,” as one sommelier puts it, “but don’t get aggressive.” Thirty to forty-five seconds of vigorous but controlled shaking is usually sufficient for fresh stains.
- Empty and rinse: Pour out the ice and salt through a strainer, then rinse with room-temperature water (never hot water immediately after ice contact — the temperature change is too extreme for crystal).
Method 6: Sparkling Water (The Quick Rinse)
This is not a deep-cleaning method — it is a maintenance method and a field-cleaning technique used at tastings, restaurants, and events where you need to quickly refresh a decanter between pours or when a full wash is not immediately possible. The carbonation in sparkling water (CO₂ dissolved under pressure) creates gentle fizzing across all interior surfaces that loosens fresh wine residue before it bonds to the glass.
- Empty the decanter of any remaining wine.
- Fill halfway with cold sparkling water (a basic unflavored soda water works perfectly — no need for expensive mineral water).
- Swirl to allow the carbonation to interact with all interior surfaces for two to three minutes.
- Pour out and follow up with a warm water rinse.
The key limitation of this method is that it only works effectively on fresh, unset residue — wine that was poured within the last hour or two. It will not remove dried anthocyanin stains or limescale. Its primary virtue is convenience and availability: even at a dinner party, you almost certainly have soda water on hand, making this a realistic same-evening maintenance step before the full clean the next morning.
Method 7: Wine Conditioning (Pre-Use Rinsing)
This is a technique for before you use the decanter, not after — and it is one of the most overlooked aspects of decanter care. The practice is sometimes called “conditioning” or “seasoning” the decanter, and it eliminates two problems simultaneously: any residual tap water taste left from the last wash, and the chlorine content of municipal tap water that can affect the first pour.
The Technique
Before pouring your wine into a freshly cleaned decanter, pour a small amount — approximately 50 to 100ml — of the same wine you intend to serve (or an inexpensive wine of a similar type if you are opening something precious) into the clean decanter. Swirl this “sacrifice” portion around to coat all interior surfaces, then pour it out. Your decanter is now lined with a neutral wine film rather than a water film, and any residual soap or cleaning odor will be absorbed by this conditioning pour and discarded with it.
This is standard practice in professional restaurant service. A sommelier who has carefully washed and polished a decanter will always condition it with a small splash of the wine being served before receiving the full bottle. It takes 15 seconds and makes a measurable difference to the aroma of the first pour.
The conditioning pour technique is not about removing stains — it is about preparing the decanter for optimal flavor delivery. Think of it as seasoning a cast-iron pan: you are creating a beneficial, wine-compatible interior coating that eliminates any environmental taints from storage, washing, or the cabinet the decanter was kept in. Always condition before serving any wine you genuinely care about tasting at its best.
All 7 Methods Compared: Which Should You Use?
Choosing the right method depends on the severity of the staining, the shape of your decanter, and how much time you have. This comparison table maps each method to its optimal use case so you can make the decision at a glance.
| Method | Best For | Time Required | Stain Severity | Tools Needed |
|---|---|---|---|---|
| 1. Cleaning Beads | Most shapes; standard daily clean | 5–10 min | Mild to moderate | Beads + mesh strainer |
| 2. Vinegar & Salt | Limescale; moderate tannin stains | 20–40 min | Mild to moderate | White vinegar, coarse salt |
| 3. Denture Tablets | Neglected decanters; zero effort | 30 min to overnight | Moderate to severe | Denture tablets |
| 4. Baking Soda + Vinegar | Deep clean; severe buildup; curved shapes | 30 min to 2 hr | Moderate to severe | Baking soda, white vinegar |
| 5. Crushed Ice + Salt | Fresh stains; quick post-party clean | 2–3 min | Fresh stains only | Crushed ice, coarse salt |
| 6. Sparkling Water | Quick refresh; between pours | 2–3 min | Very fresh residue only | Soda water |
| 7. Wine Conditioning | Pre-use preparation; flavor protection | Under 1 min | Not a stain remover | Small splash of wine |
The Art of Drying (No Water Spots!)
You have cleaned the inside, but if you let it air dry upright, water spots will form on the glass as minerals in the water deposit when it evaporates. If you flip it upside down on a towel, the humidity gets trapped inside, creating fog and potentially musty odors over time.
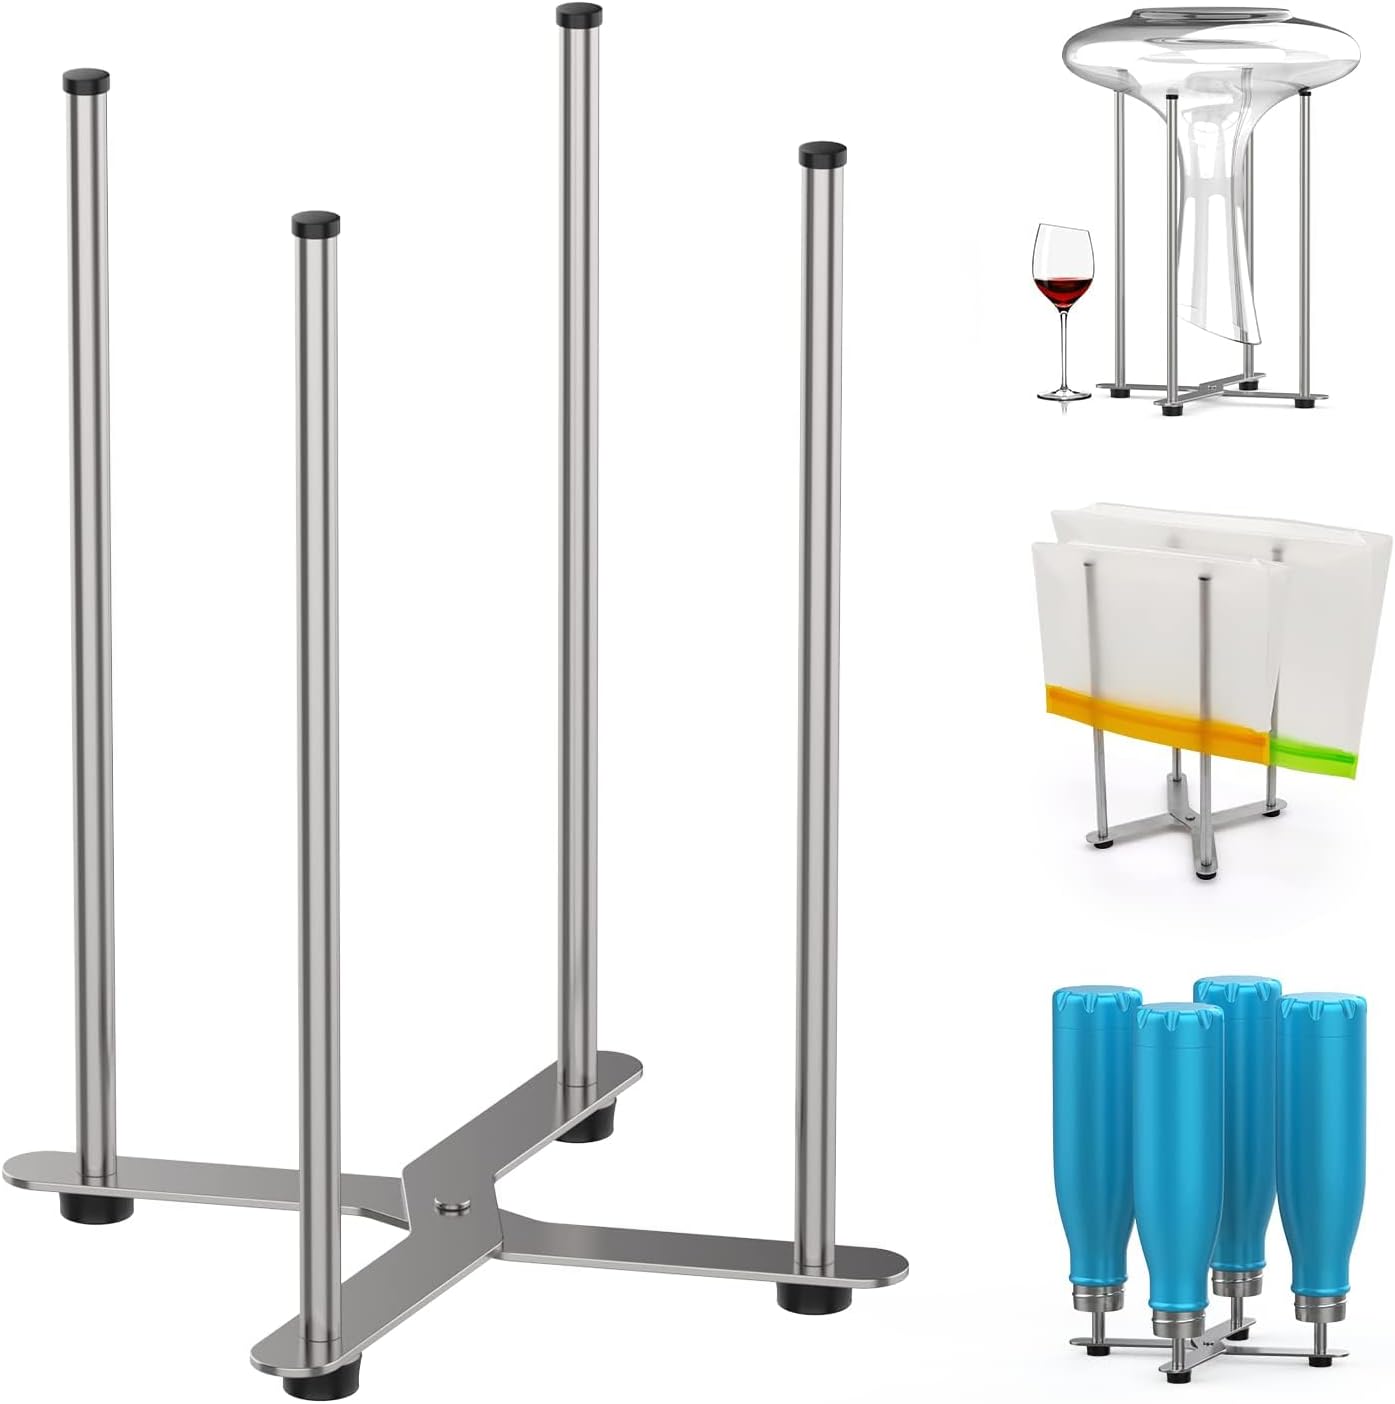
The Solution: A Drying Stand
A specialized decanter drying stand holds the vessel upside down while lifting the rim off the counter, allowing air to circulate freely through the neck and around the bowl. This is the only reliable way to get a spot-free finish without trying to stuff a towel inside. The best stands use a rotating or tilting mechanism to optimize airflow for different decanter shapes.
If you do not have a stand, you can create a wick. Twist a lint-free microfiber cloth or paper towel into a rope, insert it into the decanter so the twisted end reaches the base, and let the rest hang out over the rim. Capillary action will draw the water upward and out.
For the final step toward a completely spot-free result, use distilled water for the last rinse cycle before drying. Tap water carries dissolved minerals that deposit as spots when they dry — distilled water leaves nothing behind.
Polishing Technique: Achieving Professional-Grade Clarity
Drying removes water; polishing removes the microscopic mineral film that drying alone leaves behind. Professional sommeliers polish every decanter before service — it is the final step that transforms a merely clean decanter into one that genuinely sparkles under light. Here is how to do it correctly.
The Microfiber Polishing Method
Use a dedicated glassware microfiber polishing cloth — not a kitchen towel, not paper towels, not a cotton cloth. Microfiber’s microscopic fiber structure lifts and traps mineral residue rather than just moving it around. For the exterior of the decanter, hold the base with one hand, wrap the cloth around the bowl, and polish with gentle circular motions, working from the base upward. This approach also prevents fingerprints on the areas you have just polished.
For the interior, twist the microfiber cloth into a slim rope and insert it into the decanter neck. With one hand holding the cloth from outside and one manipulating it from inside through the neck, work the cloth across as much of the interior surface as possible. For decanters with very narrow necks, this reaches only the upper portion of the bowl — the drying stand handles the lower portion.
The Steam Polish Technique
This technique, used by professional sommeliers and crystal manufacturers, produces the highest-quality finish by using steam to loosen microscopic mineral residue before polishing. Hold the clean, dry decanter over the spout of a gently boiling kettle for 15 to 20 seconds so that steam flows through the neck and into the bowl, condensing on the interior surface. Then immediately polish with a microfiber cloth while the glass is still warm and slightly damp from condensation. The steam softens mineral deposits and the warmth of the glass accelerates drying after polishing, producing an optical clarity that cold-polishing alone cannot match.
How Often Should You Clean Your Decanter? A Complete Frequency Guide
The answer is not the same for everyone — it depends on how often you use your decanter and what wines you serve in it. Here is a framework for every usage pattern.
After Every Use
Rinse immediately with warm water the same evening. Even if you do not have time for a full clean, this prevents anthocyanin bonding. Full bead or vinegar clean the following morning.
Multiple Times a Week
Quick warm-water rinse after each use plus a full bead clean once per week. Check for film development every two to three uses and address with vinegar soak before it compounds.
Occasional Use
Full bead clean each time you use it. Before using a decanter that has been stored, always condition it with a wine splash (Method 7) to clear any storage odors before receiving your wine.
Monthly or Infrequent
Deep clean with denture tablets or baking soda-vinegar before each use, even if there are no visible stains. Microscopic residue from the last use can have developed off-flavors over weeks of storage.
A useful rule from professional glass care: if you would not drink water from the decanter without noticing an off-taste or smell, the decanter is not clean enough for wine. Fill with cold water before use and taste a small sip — if it tastes of anything other than clean water, clean the decanter before adding wine.
Hard Water and Limescale: A Special Problem
If you live in an area with hard water — much of the United Kingdom, the American Midwest, and many parts of Europe — limescale is likely the primary culprit behind your decanter’s cloudiness, not wine staining. Understanding this distinction changes your cleaning approach entirely.
How to Tell the Difference
Wine staining is typically dark — purple, brown, or black, concentrated at the base and lower sides where wine pooled. Limescale is white, grey, or milky, forming a film or ring at the water line or distributed evenly across all surfaces that were in contact with standing water. If your decanter has a cloudy overall appearance rather than localized dark staining, limescale is almost certainly the cause.
The Most Effective Treatment
White vinegar is the most practical home solution for limescale — acetic acid dissolves calcium and magnesium carbonates rapidly and completely. For light limescale, a 30-minute soak in undiluted white vinegar is usually sufficient. For heavy buildup, fill the decanter entirely with undiluted white vinegar and leave for two to four hours or overnight. The vinegar will turn slightly cloudy as the dissolved carbonates enter solution — this is normal and indicates the treatment is working.
After the vinegar soak, rinse five to six times with warm water, followed by a final rinse with distilled water if available. The distilled water final rinse is particularly important in hard water areas because tap water rinsing will simply re-deposit minerals as the water evaporates.
Long-Term Prevention
The most effective long-term prevention strategy in hard water areas is to always use a drying stand (inverted storage with airflow) rather than allowing water to pool and evaporate inside the decanter. You can also keep a simple water filter jug in the kitchen and use filtered water for the final rinse — the filter removes most dissolved minerals and significantly reduces limescale deposition. Some dedicated decanter enthusiasts use a home water softener specifically to protect their glassware.
Caring for Your Cleaning Tools
Your cleaning tools themselves require maintenance. Neglected cleaning beads, contaminated brushes, and improperly stored polishing cloths can reintroduce contamination to a freshly cleaned decanter — undermining the entire cleaning effort.
Cleaning Beads
After each use, pour the beads into a mesh strainer and rinse thoroughly under running warm water until the water runs completely clear. Spread them on a clean cloth or paper towel and allow them to air-dry completely before storing — wet or damp beads stored in a container will develop a surface film and can carry contamination from one cleaning session to the next. Once a month, give the beads a deeper clean: place them in the strainer, pour hot (not boiling) water over them, and allow them to cool and dry. Stainless steel beads are virtually indestructible under normal use — a quality set will last for many years with proper care.
Decanter Brushes
After each use, rinse the brush under hot running water while working the bristles with your fingers to expel any trapped wine residue or cleaning solution. Hang the brush upside down (bristle-end up) to dry rather than standing it in a container — standing brushes in a jar traps moisture at the bristle base and promotes mold. Once a week if used frequently, soak the brush in a cup of warm water with a small amount of white vinegar for 15 minutes, then rinse and dry. Replace the brush when the bristles become permanently bent, discolored, or when the foam head (on foam-type brushes) begins to break apart — fragments of deteriorated foam inside a decanter are difficult to remove.
Polishing Cloths
Microfiber polishing cloths are machine washable. Wash them separately from other laundry — particularly away from heavily soiled items and towels — to prevent lint transfer. Use a liquid laundry detergent at a low temperature (30°C / 86°F maximum) and never use fabric softener, which coats the microfiber and permanently reduces its ability to lift mineral deposits. Air-dry the cloths rather than tumble-drying; high heat can melt the synthetic microfiber and produce coarse spots that will scratch crystal rather than polishing it.
What NOT to Do: The Complete Mistakes List
The list of things that can damage a decanter is longer than most owners realize. Here is every mistake worth knowing about — from the catastrophic to the subtly damaging.
- Do not use the dishwasher. This bears repeating because it is the single most common and most damaging mistake. Even a single dishwasher cycle can permanently etch crystal, and the mechanical vibration of the spray arm can crack or chip thin necks.
- Do not use boiling water. The thermal shock from pouring boiling water into a room-temperature decanter can crack the glass immediately or create stress fractures that compromise structural integrity over time. Lukewarm to warm water only.
- Do not use bleach. Bleach is unnecessarily harsh for wine stains, difficult to rinse fully from narrow-necked vessels, and can permanently damage the surface of crystal. Any residual bleach in the decanter will be perceptible in the next wine you pour — and the one after that.
- Do not use abrasive pads or steel wool. The hard surface of steel wool and rough scouring pads will permanently scratch crystal and glass, dulling the optical clarity that makes a good decanter worth owning in the first place. Even slightly abrasive sponges can cause micro-scratching on lead crystal surfaces over time.
- Do not drop the beads straight in. Pour cleaning beads gently down the side of the decanter at an angle, not straight down from height. The impact of metal beads dropping into the base of a thin crystal decanter is a reliable way to crack it.
- Do not store a damp decanter. Storing a decanter that has not fully dried traps moisture inside, leading to musty odors, mold growth in extreme cases, and accelerated limescale buildup as the standing water slowly evaporates. Always dry fully before storage.
- Do not overfill when using cleaning solutions. Filling a decanter to the very brim with any cleaning solution and then swirling creates a pressurized spillage risk. Fill to approximately 60 to 70% of capacity to leave room for agitation.
- Do not rinse a cold decanter with hot water. Taking a decanter directly from a cold cupboard and running hot tap water into it creates a thermal shock differential that stresses the glass. Allow the decanter to come to room temperature for 15 minutes before cleaning if it has been stored somewhere cold.
- Do not use scented cleaning products. Fragrant soap, scented vinegar, or perfumed polishing cloths leave detectable aromatic residue in crystal. For a vessel designed to present wine aromas, even subtle off-odors from cleaning products are unacceptable. Always use fragrance-free cleaning agents.
- Do not grip the neck when washing. The narrowest point of a decanter is also the most structurally vulnerable. Gripping the neck with one hand while scrubbing with the other creates lateral torque that can snap the neck. Hold the decanter by the base or bowl, never by the neck alone.
Troubleshooting Guide: Specific Problems, Specific Solutions
When standard cleaning methods do not fully resolve a problem, the issue usually has a specific cause that requires a targeted approach. Here is a symptom-by-symptom troubleshooting guide.
Problem: Dark purple ring around the base that won’t budge
Cause: Aged, oxidized anthocyanin and tannin compounds that have been left to set over multiple uses. Solution: Start with an overnight baking soda and vinegar soak, then follow up with an extended cleaning bead treatment. If still present, repeat the soak. In extreme cases, a mixture of white wine (which contains the same organic molecules that form the stain, acting as a solvent) and beads can dissolve what vinegar alone cannot reach.
Problem: Overall hazy, milky cloudiness
Cause: Almost always limescale from hard water. Solution: Fill the decanter with undiluted white vinegar and leave for two to four hours. If the cloudiness does not fully resolve, the glass may be permanently etched — see the etching section below. Test by wiping a small area with a cloth dampened in vinegar — if clarity improves even temporarily, limescale is the cause and extended soaking will resolve it.
Problem: Musty or stale smell that persists after cleaning
Cause: Mold or bacteria from storage while damp, or absorbed odors from cabinet storage. Solution: Fill with a warm water and baking soda solution (two tablespoons per liter) and allow to soak for four hours. Rinse thoroughly, dry completely on a stand, and store in an open position — not in a closed cabinet — for 48 hours to allow the interior to fully air out. Going forward, always ensure the decanter is completely dry before storage.
Problem: White crystal deposits at the base
Cause: Tartrate crystals from wine (potassium hydrogen tartrate) — harmless and common, particularly in older wines and chilled white wines. Solution: These dissolve readily in warm water, but stubborn deposits respond to a 15-minute white vinegar soak. Unlike limescale, tartrates are organic and do not leave a film — once dissolved, the glass will be completely clear.
Problem: Soapy or chemical taste in wine from the decanter
Cause: Residual soap or cleaning product from inadequate rinsing. Solution: Perform six to eight full warm-water rinse cycles, swirling the water vigorously each time. Follow up with a white vinegar soak (vinegar neutralizes soap residue effectively), then rinse five more times. Always use the wine conditioning technique (Method 7) before the next use to create a clean wine-film baseline. Going forward, use far less soap and increase rinse cycles to at least five after any soap use.
Problem: Small particles or flakes inside the decanter
Cause: Either glass etching (tiny particles of glass surface dislodged by chemical damage or abrasion) or dried sediment from aged wine. Solution: First, determine which it is — wine sediment will dissolve in warm water or vinegar; glass particles will not. If the particles dissolve, it is sediment — a bead clean and thorough rinsing will resolve it. If they do not dissolve and appear white or clear rather than dark, the glass may be shedding etched material — stop using the decanter and consult the replacement guidance below.
Etching vs Cloudiness: Understanding the Difference
One of the most important distinctions in decanter care is between cloudiness that can be fixed and etching that cannot. Confusing the two leads either to unnecessary despair (discarding a decanter that could be saved) or wasted effort (repeatedly trying to clean something that is permanently damaged).
Fixable Cloudiness
Cloudiness caused by limescale, wine film, or soap residue is fixable because the glass surface itself is intact — you are looking through a coating of deposits, not at damaged glass. The test: if a cloth dampened with white vinegar, applied to the cloudy area, produces even a brief moment of improved clarity, the cloudiness is removable with extended acid treatment. These decanters can always be restored to full optical clarity with the right cleaning approach and patience.
Permanent Etching
Etching is physical damage to the glass surface — microscopic pitting and scratching created by the combination of alkaline detergents, heat, and mechanical action in a dishwasher, or by repeated use of abrasive scouring materials. Etching looks similar to cloudiness at first glance, but the vinegar test reveals the difference: etching shows no improvement when wiped with acid because the problem is not a surface deposit but the glass surface itself scattering light differently due to physical damage.
Etching is unfortunately irreversible in standard glass and crystal. Once the surface is pitted at the microscopic level, no amount of cleaning or polishing will restore the original optical clarity. Etched crystal also becomes more difficult to clean going forward because the rough, pitted surface provides many more sites for wine residue and limescale to bond. If your decanter shows signs of etching, consider it a lesson in the importance of hand-washing — and a signal that replacement may be warranted.
Long-Term Storage: Preparing Your Decanter for Extended Rest
If you intend to store a decanter for more than a few weeks — perhaps between seasons, or if you are putting away a special-occasion vessel — the preparation for storage requires more care than simply cleaning and putting it in a cabinet.
The Pre-Storage Cleaning Protocol
Before any extended storage, perform a full deep clean using the baking soda and vinegar method, followed by a distilled water final rinse and complete drying on a stand. Any residue left in the decanter will concentrate and harden during the storage period, making it significantly more difficult to remove later. Pay particular attention to the neck interior, which is easy to neglect during routine cleaning but can accumulate a wine film that becomes increasingly tenacious over weeks and months.
Storage Orientation and Environment
Store decanters upright (not inverted) unless your cabinet shelf is specifically designed with padded slots for inverted storage. Upright storage allows any remaining moisture to evaporate freely. If the cabinet has any wood odor — particularly cedar, pine, or particleboard off-gassing — place a small piece of activated charcoal inside the decanter during storage to absorb ambient odors. Crystal’s microscopic porosity means it absorbs odors from its storage environment over time, and a decanter stored for months in a musty cabinet will transfer those odors to your wine.
Avoiding Storage Stoppers
Unless your decanter has a ground-glass stopper that is specifically designed for long-term sealing, do not seal a decanter during storage. An unsealed decanter allows air to circulate and prevents the interior from developing the stale, closed smell that is a common complaint after long storage periods. If the decanter has a decorative stopper, leave it slightly ajar or store it alongside the decanter rather than in place during extended storage.
When to Replace Your Decanter
No cleaning guide would be complete without acknowledging that some decanters reach the end of their useful life — and that continuing to use a compromised vessel can genuinely affect the quality of the wine you serve from it. Here are the clear signals that replacement is warranted.
- Confirmed permanent etching: If the vinegar test confirms etching rather than removable cloudiness, the optical beauty of the decanter is permanently diminished. More practically, the rough, etched surface provides significantly more bonding sites for future wine residue and limescale, making every subsequent cleaning harder. Etched crystal is also structurally weaker at the surface layer. Replace it.
- Chips or cracks in the neck: A chipped neck or any visible crack is a health and safety concern as well as a serving problem. Chips create sharp edges and can shed glass fragments into wine. Any visible crack, even a hairline, is a structural failure that will worsen over time. Stop using immediately.
- Persistent off-odors that do not resolve: If a decanter smells musty, soapy, or of old wine after a thorough deep clean followed by extended airing, the odor is likely embedded in the glass at a level that cleaning cannot reach. This is particularly common in lead crystal that has absorbed residue over many years. If the conditioning pour (Method 7) tastes or smells off even after multiple deep cleans, the decanter has reached the end of its useful life.
- Shedding glass particles: Any evidence of glass particles or flakes in the rinse water after cleaning indicates surface deterioration that makes the decanter unsafe for serving wine. This is rare but does occur in very old or heavily abused crystal.
Routine Maintenance Tips
- Exterior Shine: Use a microfiber polishing cloth to wipe down the outside of the decanter to remove fingerprints and minor water spots.
- Hard Water Areas: Use distilled water for the final rinse to prevent mineral buildup. This single habit eliminates most limescale problems.
- Storage: Store your decanter in a cabinet to prevent dust accumulation. Rinse and condition (Method 7) before using a stored decanter. Check our cellar essentials for storage ideas.
- Regular Polish: Even without visible staining, a monthly exterior and interior polish keeps the crystal at its optical best and reveals any developing cloudiness before it becomes entrenched.
- After White Wine: White wine leaves less visible staining than red but still deposits residue. Apply the same immediate-rinse discipline after white wine use that you would after red.